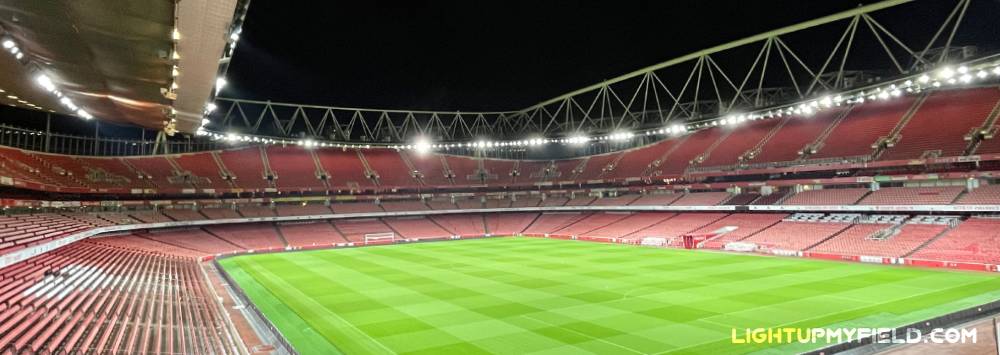
Ever sat in a packed stadium at night, marveling at how everything on the field is lit so clearly, almost like it’s still daytime? It’s kind of wild when you think about it—lighting up a massive space like that isn’t as simple as just flipping a switch. So, how do you light up a stadium?
Lighting a stadium involves more than just brightness. It’s about making sure every corner is visible, the colors are accurate, the players aren’t blinded, and the fans can see all the action. And let’s not forget—it all has to look great on camera too. Whether it’s a local high school field or a world-class arena, the process behind stadium lighting takes careful planning and some solid decision-making.
Let’s break down how it all works, step by step.
Table of Contents
ToggleWhat Are Stadium Lights?
Before diving into the process of setting up a stadium’s lighting system, it’s good to understand what these lights actually are—and why they’re so different from the bulbs in your home or office. Stadium lights are extremely powerful, high-intensity luminaires specifically engineered to illuminate massive outdoor or indoor spaces. Their main goal? To make sure players, officials, and fans can see everything clearly, no matter the time of day or weather conditions.
You’ll typically find these fixtures mounted high above the ground—often on poles ranging from 30 to 60 meters tall (that’s roughly 100 to 200 feet), or on catwalks and rooftops in closed arenas. This elevation allows the beams to spread light evenly across an entire playing surface without leaving dark patches.
Traditional stadium lights relied heavily on metal halide lamps, a technology that dominated for decades because of its bright white light. These lamps usually produced 400 to 2,000 watts per fixture and delivered illumination levels between 500 and 2,000 lux, depending on the sport and level of competition. However, they came with several downsides: long warm-up times (up to 15 minutes to reach full brightness), shorter lifespans (around 6,000–12,000 hours), and higher energy consumption.
Today, LED lighting systems have taken over as the new standard, and for good reason. LED stadium lights are up to 60–70% more energy efficient than traditional lamps, turning that old 2,000-watt power draw into something closer to 600–800 watts for the same brightness. They also last much longer—typically 50,000 to 100,000 hours—and turn on instantly, which is a game changer for venues hosting multiple events in a single day.
Another huge advantage of LEDs is control. With older lights, you were stuck with full brightness or nothing. Modern LED systems allow dimming, zoning, and even color-changing capabilities. That means operators can adjust brightness for a casual training session, crank it up for a televised match, or run dynamic light shows for halftime entertainment—all from a centralized control system.
So when someone mentions “stadium lights” today, they’re almost certainly talking about an advanced LED-based system—one that’s energy-efficient, highly controllable, and designed for both performance and spectacle.

Steps to Light Up a Stadium
Lighting a stadium is definitely not a one-size-fits-all kind of thing. Different sports, stadium sizes, locations, and even weather conditions play a role. But generally, the whole process follows a few major steps: planning the design, picking the right lights, figuring out how many are needed, adjusting the aim, choosing the right color temperature, and finally, installation and testing.
Let’s walk through each of these steps.
Lighting Design
The process always starts with a lighting design plan. This isn’t just “put lights around the field”—it’s about strategically mapping out fixture positions, aiming angles, and beam spreads to ensure uniform brightness without shadows or glare.
Most designers use photometric simulation software to visualize light distribution across the field and seating areas. The simulation factors in pole height (often 30–60 meters for pro stadiums), beam angles, and spill light control. Too much glare can make life hard for players and fans, so getting this right is key.
For televised events, the requirements are even more demanding. FIFA’s Football Stadium Lighting Guide specifies that top-tier matches need at least 2000 lux horizontally and uniform vertical illuminance for cameras. These higher levels prevent shadows that could interfere with live broadcasts or replays.
Selection of Lights
Once the design is set, it’s time to pick the lights themselves. LED fixtures dominate modern stadiums for plenty of reasons: they use 60–70% less energy than traditional metal halide lamps, switch on instantly (no 15-minute warm-up), and last 50,000–100,000 hours versus the 6,000–12,000 hours you’d get from older lamps.
LEDs also provide precise beam control, which helps reduce light spill into surrounding neighborhoods—a big issue in urban areas. Plus, they allow dimming and dynamic control, meaning you can adjust light intensity for different events or even create pre-programmed lighting scenes for halftime shows.
Different sports and venues demand different beam patterns. For example, a football stadium needs broad, even coverage, while a baseball field might require asymmetrical lighting to cover the infield and outfield without glare.
Durability is another factor. These fixtures are exposed to rain, wind, snow, and high heat. High-quality stadium lights carry IP65 or higher weatherproof ratings to handle the elements without performance loss.
How Many Lights Do You Need?
Here’s where the numbers get interesting. The quantity of lights depends on field dimensions, mounting height, and the lighting class for your sport. For instance:
- A local soccer field (around 100 x 64 meters) might use 30–40 LED fixtures, each in the 500–1000W range.
- A professional football stadium can require 150–250 fixtures or more, each producing up to 120,000 lumens, to reach the 1500–2000 lux required for HDTV broadcasts.
Using too few fixtures creates shadows and dark spots, while too many can lead to glare and wasted energy. That’s why photometric software is essential—it ensures every square meter gets the right amount of light, in compliance with standards like BS EN 12193:2007 or FIFA Class V lighting levels.
Aiming the Lights
Once you know how many lights you need and where to put them, aiming comes next. This is more complex than just pointing them downward. Each light is aimed at a precise angle to ensure beams overlap correctly and create uniform illumination.
Installers often use laser alignment tools and aiming charts for accuracy. Even a 2–3° adjustment can affect glare and coverage significantly. Some advanced LED systems now allow remote aiming and focus adjustments via software, which is a big time-saver compared to manual methods—especially when dealing with hundreds of fixtures mounted 50 meters high.
Color Temperature and CRI
Color temperature might sound like a detail you can ignore, but it affects both visibility and how the game looks on camera. Most stadium lighting falls between 5000K and 6000K, which gives a bright, daylight-like white. Go too warm (like 3000K) and the field looks yellowish; too cool (above 6500K) and it starts feeling harsh.
Then there’s CRI (Color Rendering Index), which measures how accurately colors appear under the lights. For sports, a CRI of 80 or higher is the norm, and for high-definition broadcast events, CRI 90+ is recommended. This makes sure team jerseys, the ball, and even advertising boards look crisp and true to color.
Controlling the Lighting
Modern LED systems aren’t just on/off anymore—they’re smart. A central control system can dim lights for training sessions, schedule lighting for events, and even create custom lighting effects for entertainment. This flexibility isn’t just for aesthetics; it helps cut energy costs by reducing light output when full power isn’t needed.
Advanced setups can integrate sensors for daylight harvesting, automatically adjusting brightness based on ambient light. Some stadiums even pair controls with energy management systems, which track usage and help operators save thousands in annual electricity costs.
Installation and Testing
Finally, the physical installation begins. This part involves engineers, electricians, and cranes to hoist fixtures onto massive poles or catwalks. Once installed, testing ensures everything meets the design specs: brightness, uniformity, glare control, and color accuracy.
If testing reveals dark spots or glare issues, adjustments are made—either by re-aiming fixtures, changing beam angles, or tweaking control settings. Only when all tests pass does the lighting system go live, ready to host games and broadcasts.
So, How Do You Light Up a Stadium?
Turns out, lighting up a stadium isn’t just a matter of putting up a few big lights and calling it a day. It’s a detailed, well-thought-out process that involves smart planning, the right tech, and a bit of know-how.
From designing the layout to choosing LEDs, figuring out the perfect angles, picking the right color temperature, and setting up control systems—every step plays a part in making the stadium shine. And when it’s all done right, the result is pretty awesome: a well-lit field where the game can go on, rain or shine, day or night.
Whether you’re watching from the bleachers or catching the game on TV, now you know what it takes to make that perfect lighting happen. It’s kind of cool to think about, right?

