
If you’ve got a go-kart track—whether it’s in your backyard or part of a small business—proper lighting can totally change the vibe. It’s not just about being able to see at night; it’s about creating that racing atmosphere that feels exciting and safe at the same time. But then comes the big question: can you handle the installation on your own, or do you really need to call in an electrician?
Let’s break it down and look at what’s involved in setting up a go-kart track lighting system, what to expect if you go the DIY route, and when it might make sense to get some professional help.
What Are Go-Kart Track Lighting Systems?
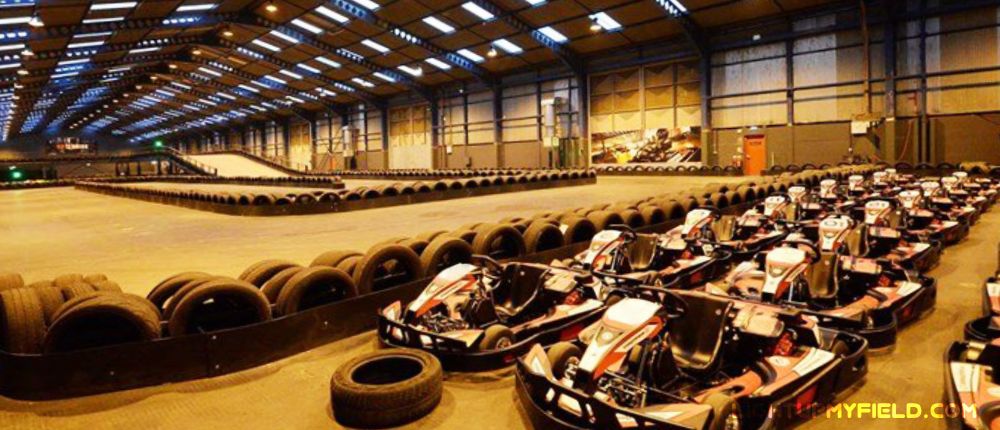
A go-kart track lighting setup isn’t just a bunch of floodlights thrown around. It’s actually a coordinated system made up of several components that work together to give consistent, safe, and visually appealing illumination.
The Lights Themselves
Most go-kart tracks use LED floodlights or spotlights because they’re bright, energy-efficient, and last a long time—often up to 50,000 hours. You can find them in different wattages depending on the area size. For example, a small backyard track (about 200 meters long) might need 8–12 LED floodlights of 150–200 watts each. Larger or commercial tracks may go for more powerful 300–400W fixtures to cover longer straights and turns.
The light color also matters. Many track owners prefer cool white (5000–6000K) lights because they mimic daylight and help drivers see better. Some people even mix in a few warmer tones for a more cinematic effect.
Switches and Controls
Your lighting system isn’t complete without a way to control it. Simple setups may only need a manual switch panel with a few labeled switches. More advanced systems can include smart controllers that let you manage the lights from your phone or a remote, set up timers, or even dim the brightness for different race modes. If you’re running night events regularly, automated systems can save a lot of hassle.
Wiring and Electrical Layout
This part can be tricky. You’ll need weatherproof wiring, junction boxes, and proper grounding to make sure everything’s safe and compliant with local codes. Outdoor-rated cables, like 12/2 UF-B or similar, are commonly used for outdoor lighting runs. Everything should be protected from moisture, dust, and vibration—especially around tracks where there’s a lot of movement and occasional splashing.
Mounting and Positioning
Light placement is where the magic happens. Mounting poles are typically 4 to 6 meters high, spaced around curves and straights to minimize shadows and glare. Each light needs to be angled correctly—usually around 25–35 degrees downwards—so drivers can see clearly without being blinded.
Installing Myself vs. Hiring an Electrician
So, here’s where the debate really starts. You might be tempted to save a few bucks by doing the installation yourself. After all, how hard could it be to hook up some LED floodlights and run a few cables, right? But when it comes to go-kart track lighting, things can get more technical than they seem at first glance. Between voltage drops, waterproof connections, and proper grounding, it’s worth asking: is doing it yourself really the smarter move?
| Factor | DIY Installation | Hiring an Electrician |
|---|---|---|
| Materials & Tools | LED fixtures, poles, conduit, outdoor-rated cables, tools. | Licensed electrician provides all materials and tools. |
| Cost | $1,200–$2,500 (hardware only), plus 20–30 hours of labor. | $2,000–$4,500, including labor, trenching, and wiring setup. |
| Risk of Mistakes | Possible wiring errors, voltage drop, and short circuits. | Professionals ensure safe, code-compliant installation. |
| Safety & Complexity | Need to calculate voltage drop, grounding, and wiring. | Expert grounding, proper voltage calculation, and safety. |
| Convenience | Flexible timing, but requires troubleshooting and learning. | Peace of mind with a guaranteed, professionally-installed setup. |
| Reliability & Durability | Potential for failures (e.g., flickering lights, burnt-out LEDs). | Warranties, reliable long-term setup, and compliance with codes. |
| Best for | Small, personal tracks (100-200m). | Larger, commercial, or semi-professional tracks. |
| Time Commitment | 20–30 hours (weekends, trial & error). | Professionals complete in a fraction of the time (1–2 days). |
Materials and Tools Needed for DIY Setup
If you’re planning to go the DIY route, get ready for some hands-on work. You’ll need more than just a few lights and wires. A typical go-kart lighting setup requires LED fixtures (usually 150–400 watts each), mounting poles or brackets, electrical conduit, outdoor-rated cables, junction boxes, and grounding rods. You’ll also need switches, waterproof connectors, cable glands, and weatherproof enclosures—because these lights are constantly exposed to rain, dust, and vibration from the karts.
For tools, expect to use a drill, wire stripper, voltage tester, crimping tool, and a multimeter to test the circuits. A few bags of concrete for pole bases might come into play too. If your track covers around 300 meters, you’ll probably need around 10 to 14 floodlights spaced evenly across turns and straights, plus at least 150–200 meters of conduit and 300 meters of wiring.
Material costs for a setup like this can easily range from $1,200 to $2,500—and that’s just the hardware. If you go for higher-end LED sports lights with adjustable beam angles and smart dimming, expect that number to jump closer to $3,000 or more. And remember, that doesn’t include your time. If you’re new to electrical work, expect to spend 20–30 hours from planning to final testing. For most people, that’s at least a couple of full weekends.
Cost Comparison: DIY vs. Professional Installation
At first glance, DIY seems like the cheaper option. No labor fees, no waiting around for quotes, and you can set your own pace. But once you factor in the value of your time, plus the risk of mistakes, the savings might not be as big as they look.
Hiring a licensed electrician for a track lighting installation usually costs between $2,000 and $4,500, depending on track size, fixture count, and the complexity of your layout. This often includes trenching for underground wiring, mounting poles securely, installing weatherproof junction boxes, and setting up your control system properly. Some electricians even offer energy optimization setups that can save you up to 20% on power bills through better wiring layouts and LED driver selection.
In contrast, DIY might cost $1,000–$1,500 less upfront, but any small wiring mistake—a loose neutral, bad connection, or miscalculated voltage load—could lead to flickering lights or even a short circuit that fries your driver units. Replacing one LED floodlight could cost around $200–$400, and if you burn out several at once, that’s already close to what you “saved” by not hiring a pro.
So the question becomes less about cost and more about reliability. Electricians not only know how to wire things safely, they also make sure everything’s up to local electrical codes and outdoor lighting regulations. If you ever expand or sell your property, that compliance can save a lot of headaches down the road.
Safety and Technical Complexity
Outdoor go-kart tracks come with specific electrical challenges that aren’t always obvious to DIY installers. For example, voltage drop becomes a real issue when lights are spaced far apart. If you don’t calculate the proper wire gauge, the lights at the far end of your track might not shine as bright as those closer to the power source. Professionals calculate that stuff precisely using Ohm’s law and load charts, making sure each light gets the power it needs.
Then there’s grounding. Every metal pole should be properly bonded and grounded to prevent shocks during wet weather. Electricians use grounding rods and 10–12 AWG copper wires for this, something many DIYers skip or do incorrectly. That’s not just about protecting the equipment—it’s about keeping drivers and spectators safe, especially in outdoor conditions where humidity and rain are common.
Convenience and Peace of Mind
Now let’s talk convenience. Doing it yourself has that hands-on satisfaction. You get to learn how the whole system works, fine-tune each light’s angle, and maybe even brag a little about it later. You can adjust the light positioning anytime you want, change beam angles, or add new fixtures as your track grows. Plus, there’s a sense of pride when you flip that switch for the first time and see the entire track glow.
But that freedom comes with a fair amount of stress. You’ll need to double-check wiring diagrams, troubleshoot if lights don’t power up evenly, and make sure your breaker load isn’t exceeded. One overloaded circuit can trip everything mid-race. With an electrician, you get peace of mind knowing everything’s installed safely and balanced across multiple circuits.
Professionals also offer warranty coverage for their work, which means if something fails prematurely due to wiring or connection issues, they’ll usually fix it at no extra charge. That kind of backup can be worth a lot—especially if your track hosts paid events or night races where downtime means lost income.
Choosing the Right Option for Your Track
If your go-kart track is just for fun—say, a small 100–200 meter backyard circuit—DIY can absolutely make sense. The voltage is manageable, and you can take your time learning and experimenting. Just make sure to use outdoor-rated cables, waterproof fittings (IP65 or higher), and check your connections with a tester before powering up.
But for anything bigger, especially a commercial or semi-professional setup with dozens of lights and multiple power zones, hiring an electrician is usually the smarter call. Commercial systems often need load balancing, surge protection, and structured conduit routing, all of which are hard to do right without professional experience.
At the end of the day, it really comes down to how much time and risk you’re willing to take on. Doing it yourself can be rewarding, but a professional installation gives you confidence that every light will stay bright, steady, and safe no matter how intense the race gets.
Lighting Design for DIY or Electrician
Lighting design is what makes your go-kart track look professional instead of like a last-minute backyard setup. Whether you’re handling it on your own or working with an electrician, a solid design plan can make all the difference in how your track feels and performs at night. It’s not just about brightness—it’s about visibility, safety, and vibe.
Layout Planning and Light Distribution
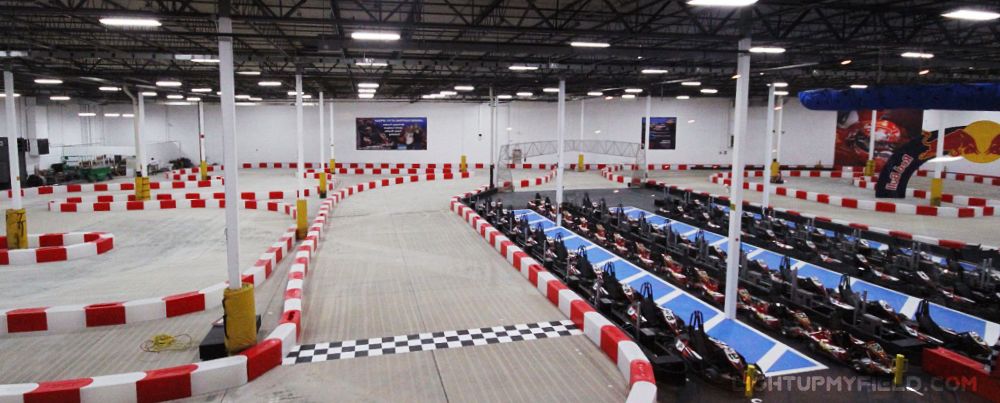
Start by sketching your track’s layout, marking the turns, straightaways, pit area, and spectator zones. Each section has slightly different lighting needs. Curves and turns need more concentrated lighting—usually from fixtures mounted on 5 to 6-meter poles angled at about 30 degrees—while long straight sections can have wider spacing between lights, typically 15 to 20 meters apart depending on fixture brightness.
A good lighting layout should maintain consistent illumination across the track, with minimal shadows or blind spots. For a small hobby track, aim for 50–70 lux on the driving surface (about as bright as a well-lit parking lot). Commercial tracks should shoot for 100–150 lux, similar to small sports arenas. The key is balance—drivers should be able to see clearly without any glare or overexposure.
When designing your layout, remember that lights shouldn’t just point straight down. You want overlapping light beams that blend smoothly so that when karts move between zones, the brightness feels continuous. Electricians often use photometric design software to simulate coverage, while DIYers can test in real time using a smartphone lux meter app.
Avoiding Glare and Harsh Shadows
Glare can ruin a night race faster than anything else. Lights that are mounted too low or aimed too directly can blind drivers when they come around a corner. A mounting height of around 5 meters (16 feet) tends to work well because it provides wide coverage without direct glare. The beam angle should usually be between 25° and 40°, depending on the track width.
For DIY setups, it helps to do a few nighttime test runs. Have someone drive a kart or walk the track while you adjust light angles until the visibility feels even and comfortable. Avoid placing fixtures directly behind spectator areas or at eye level near pit zones. If your track includes elevation changes, you may need additional fixtures at lower angles to cover dips or slopes properly.
Professional electricians usually bring a light meter or use CAD-based lighting design tools to fine-tune all this. But even if you’re going DIY, spending a few extra hours testing and repositioning lights can completely change the look and safety of your track.
Aesthetic and Safety Considerations
Lighting design isn’t just about making things bright—it’s about setting the tone. A well-lit go-kart track feels exciting, almost cinematic, especially when you mix in a few accent lights. Try adding LED strips or low-voltage marker lights along barriers, starting lines, and pit lanes. These don’t just look cool—they also help racers stay oriented on the track.
For spectator zones, rest areas, or parking lots, use warmer white lights (3000–4000K). They’re easier on the eyes and create a relaxed atmosphere. Keep the racing surface brighter with cooler tones (5000–6000K) to enhance visibility. This balance helps separate areas visually and keeps drivers focused.
Safety lighting is another key part of the design. Make sure emergency exits, pit lanes, and any track-side walkways have dedicated illumination. Even low-power fixtures like 30W LEDs can be enough for these areas. The idea is to prevent dark zones where people might trip or lose their bearings.
Design Testing and Adjustments
Before finalizing your setup—whether DIY or professional—it’s smart to test your lighting in real-world conditions. Turn the lights on after dark and walk the track from a driver’s point of view. Look for shadow zones or overly bright spots. You might be surprised how different it looks once you’re on the ground versus on paper.
If you’re doing it yourself, you can make temporary mounts or use portable stands for initial testing before setting poles in concrete. Electricians usually take light readings at several points on the track (using a lux meter) to ensure the illumination is consistent. If your readings vary by more than 20% from point to point, it’s worth tweaking the angles or repositioning a few fixtures.
Good lighting design takes patience, but it pays off the moment your karts start racing under a perfectly lit track. Whether you DIY or go with a pro, the goal is the same: a smooth, shadow-free, energy-efficient lighting system that keeps drivers safe and the races thrilling from start to finish.
Tips for Go-Kart Track Lighting Installation

Whether you decide to tackle the installation yourself or bring in an electrician, there are a few extra steps that can make your go-kart track lighting system last longer, perform better, and look a lot more professional. It’s easy to underestimate the small stuff, but these little details often make the biggest difference once your lights are up and running.
Use Weatherproof Components for Longevity
Outdoor environments can be unforgiving—especially for anything electrical. Between heavy rain, humidity, dust, and even vibration from the karts themselves, your setup needs to be tough. Always go for IP65 or higher-rated fixtures; that means your lights are protected against both dust and low-pressure water jets. If your area gets frequent storms or you’re near the coast, IP66 or IP67 fixtures are worth the upgrade.
Don’t forget about the accessories—waterproof connectors, rubber gaskets, and UV-resistant cables should all be part of your setup. Even a small crack in a junction box or loose seal around a cable gland can cause moisture buildup, which leads to corrosion or short circuits over time. Spending an extra $100–200 on proper outdoor-grade materials now can save you hundreds in repairs later.
Plan Ahead for Maintenance and Accessibility
LED floodlights are incredibly durable, often rated for 50,000 hours or more, but that doesn’t mean you’ll never have to touch them again. Dust buildup or insects around the fixtures can dim the brightness over time. That’s why it’s smart to install your lights where they can be easily reached for cleaning, alignment, or replacement.
If your lights are mounted higher than 4 or 5 meters, consider using tilting brackets or removable pole tops so you can adjust the beam angle or swap out fixtures without having to bring in a lift every time. Some DIY installers even design poles with a hinge at the base, letting you lower them safely for maintenance. It’s a small design tweak that can make future upkeep way easier.
And here’s a pro tip: create a maintenance log. Note down when each fixture was installed, serviced, or cleaned. That record helps you track performance over time and spot any recurring issues, especially if you’re running multiple night events throughout the year.
Label Everything Clearly
It sounds almost too simple, but proper labeling can save hours of frustration later. Once all the wiring is tucked into conduits, it’s hard to remember which line powers which section of the track. By labeling your wires, breakers, and switches with waterproof tags, you’ll know exactly where to start when troubleshooting.
You can number each light pole (like “Pole 1 – Turn A” or “Pole 6 – Straightaway”) and match that with the corresponding circuit breaker or switch. This is especially handy if a section of the track goes dark mid-race—you’ll be able to find and fix it in minutes instead of tearing apart your setup trying to figure out which wire does what.
Always Check Local Electrical Codes and Regulations
Even if your track is on private property, local electrical and safety codes still apply. Many regions require permits or inspections for outdoor lighting systems that connect to the main electrical grid. Some municipalities have limits on light spill or brightness (lux levels) to prevent glare affecting nearby homes or roads.
Before installing anything permanently, it’s worth calling your local building department or energy authority to confirm what’s allowed. Electricians usually handle this part automatically, but if you’re going DIY, you don’t want to find out later that your setup violates a rule. Fixing non-compliant wiring or relocating poles can easily cost double what it would have to do it right the first time.
Test Your Setup Before Finalizing Installation
One of the best ways to avoid disappointment is to test everything before cementing poles or sealing conduit lines. Once the lights are mounted temporarily, power them up after dark and walk the track. Look for dark patches, glare spots, or uneven illumination. You’ll quickly notice where adjustments are needed—especially in corners or areas with elevation changes.
If you have access to a lux meter (even a phone app will do), measure brightness across different parts of the track. For smaller backyard circuits, keeping readings around 60–80 lux should give a comfortable level of visibility. For commercial or competitive tracks, aim closer to 120–150 lux for a crisp, professional look.
When everything feels balanced and the light spread looks even, then you can go ahead and finalize your wiring runs, pour the concrete for poles, and seal up the conduit. That extra night of testing might seem tedious, but it’s way easier than redoing half your setup later.
Wrapping Things Up
Installing go-kart track lighting yourself is totally doable if you’ve got some basic electrical knowledge and don’t mind putting in the time. It gives you more control over your setup and can save money. But for larger or commercial tracks—or if you’re unsure about wiring—it’s definitely safer and more reliable to bring in a professional electrician.
A well-designed lighting system can make racing at night feel just as thrilling as during the day, with that extra touch of atmosphere and safety. Whether you go the DIY route or hire an expert, the real goal is the same: a bright, fun, and safe track that keeps the action going even after the sun goes down.