Go-kart racing is all about speed, focus, and adrenaline. But when the sun goes down or when you’re setting up an indoor track, lighting becomes a game-changer. The right lighting design not only helps racers see the track clearly but also keeps everyone safe and makes the whole place look way more professional. Whether you’re building a new circuit or upgrading an old one, having a proper lighting plan before jumping into installation can save a lot of time, money, and headaches.
Importance of Getting Lighting Design Before Purchase and Installation
A lot of people think they can just buy some floodlights, put them up, and call it a day. But lighting a go-kart track isn’t that simple. Every track has its own shape, turns, and visibility challenges. Without a design plan, you might end up with uneven brightness, too much glare, or even dark patches that can cause accidents.
Getting a lighting design done before you buy or install anything helps you figure out exactly how many fixtures you need, what wattage works best, and where to place them. It’s like having a map before a road trip. The lighting layout can also predict how much energy you’ll use and how much it’ll cost in the long run. That’s why professional designers use lighting simulation software like Dialux or Relux to test setups virtually before anything gets built.
Plus, once the design is locked in, you’ll have an easier time getting quotes and approvals. Contractors love it when there’s a plan—it keeps things on schedule and on budget.
Lighting Design Principle

Designing lighting for a go-kart track isn’t just about throwing in some bright lamps and calling it a day. It’s really about balance—between visibility, comfort, and energy use. Racers move fast, sometimes hitting 60–80 km/h on tighter indoor tracks and up to 100 km/h on outdoor circuits, so visibility has to be spot-on. The right lighting setup helps drivers read the curves, braking zones, and track markings clearly while keeping the overall atmosphere exciting but safe. Let’s break down the key factors that shape a solid go-kart lighting design.
Lux / Foot-Candle (Brightness Level)
Brightness—measured in lux or foot-candles (fc)—is one of the first things to figure out. In most go-kart track lighting projects, the sweet spot for illumination sits around 200–300 lux (about 20–30 fc) for recreational or training-level tracks. For competitive or televised racing events, you’ll need stronger lighting in the range of 400–600 lux (around 40–60 fc) to ensure every section of the circuit is crystal clear, both to the drivers and to the cameras capturing the action.
Indoor tracks usually require more brightness than outdoor ones since there’s zero natural light to help out. The main goal is to have an even, consistent brightness level so drivers can anticipate turns and acceleration zones without straining their eyes. When lighting is too dim, drivers lose depth perception; when it’s too harsh, glare can become a problem. A good design ensures the track looks as vivid at 10 p.m. as it does at noon.
Color Temperature
Color temperature, measured in Kelvin (K), makes a huge difference in how the track looks and feels. For go-kart racing, most designers aim for a cool white light between 4000K and 5700K. This range gives a clean, natural daylight-like look, which helps drivers judge distances and corner angles more precisely. It also enhances the visibility of track lines, flags, and safety zones.
Warmer lighting (below 3500K) might feel cozy for a lounge area, but on the track, it tends to wash out colors and make it harder for racers to see braking points clearly. Under cooler white lighting, kart numbers, helmets, and sponsor decals also pop more—great for photography and for spectators watching from the sidelines or live streams.
Glare Control
 If you’ve ever been blinded by oncoming headlights, you already know how glare can ruin visibility. On a go-kart track, that’s even worse—imagine trying to take a sharp corner while a beam of light hits your visor. A solid lighting design minimizes glare through the use of asymmetric beam angles, diffusers, and anti-glare visors on fixtures.
For example, LED floodlights with beam angles between 60° and 120° can be positioned strategically so that light spreads smoothly across the tarmac but stays out of drivers’ direct line of sight. In competitive environments, designers often run computer simulations to make sure glare levels stay below recommended limits—typically under 10% Unified Glare Rating (UGR). The goal is to light up the asphalt, not the driver’s eyes.
Light Uniformity
Light uniformity determines how evenly the brightness spreads across the track. If one corner is overly bright and another is dark, it messes with a driver’s depth perception. The ideal uniformity ratio for go-kart tracks is usually 0.6 or higher, meaning the minimum brightness is at least 60% of the maximum brightness across the circuit.
Uniform lighting also helps cameras capture smoother, more professional-looking footage—something that’s become a big deal as more tracks host social media events and livestreams. Designers often simulate light spread using 3D software before installation, ensuring every curve and straightaway gets consistent coverage. For a 400-meter indoor track, that could mean installing 40–50 evenly spaced LED fixtures, all aimed precisely to reduce shadows and hotspots.
| Design Factor | Key Metric / Range | Units |
|---|---|---|
| Brightness (Recreational / Training) | 200–300 | lux (≈20–30 fc) |
| Brightness (Competitive / Televised) | 400–600 | lux (≈40–60 fc) |
| Color Temperature | 4000–5700 | Kelvin (K) |
| Beam Angle | 60°–120° | Degrees |
| Light Uniformity Ratio | ≥0.6 | Ratio (Min/Max Lux) |
Energy Consumption
Now let’s talk about the long-term game—energy efficiency. Running dozens of high-powered lights for several hours a night can rack up serious electricity costs. That’s why modern go-kart facilities almost always go with LED technology. LEDs can slash energy use by up to 65–75% compared to older metal halide or mercury vapor lamps. For example, replacing fifty 400W metal halide fixtures with 200W LED floodlights can cut monthly power bills nearly in half while delivering brighter, more consistent lighting.
On top of that, LEDs generate much less heat, meaning you don’t need extra ventilation for indoor setups. Their longer lifespan—often 50,000 to 100,000 hours—means fewer replacements and less downtime for maintenance. Over five years, that’s a big cost saver, especially for tracks that operate daily or host nighttime events.
Types of Lighting for Go-Kart Tracks

Not all lighting systems are created equal. The type of fixture you choose affects everything from light quality to maintenance schedules. Here’s a closer look at what’s out there and why LED has become the top choice for go-kart track owners and designers.
Metal Halide Lamps
For decades, metal halide lights were the go-to option for race tracks because they delivered strong illumination and decent color rendering (around 65–80 CRI). However, they take several minutes to warm up to full brightness and tend to lose intensity over time—sometimes by 30% after just 2,000 hours of use. Their average lifespan is about 10,000–15,000 hours, and frequent replacements can disrupt track schedules.
Another downside? Flicker. Fast-moving objects like go-karts can appear blurred or “ghosted” under flickering light, which is bad news for both drivers and live cameras.
Mercury Vapor Lamps
Mercury vapor lighting is one of the oldest forms of outdoor illumination, and while it used to be common, it’s now mostly outdated. These lamps are inefficient—often converting less than 25% of their power into visible light—and their color rendering index (CRI) hovers around 50, which gives a dull, bluish tone. Plus, mercury is hazardous, making disposal tricky and environmentally unfriendly. Most racing venues have phased them out completely.
Solar Lighting
For smaller outdoor go-kart circuits or temporary setups, solar lighting sounds appealing—it’s renewable and independent from the power grid. However, it’s not quite ready to replace wired systems for high-performance tracks. The main challenge is light consistency: cloudy weather or shorter winter days can drop the output drastically. Even high-quality solar floodlights usually deliver around 80–100 lumens per watt, compared to 150–180 lm/W for premium LEDs. That’s a noticeable gap when you’re trying to maintain safe, uniform lighting on a 600-meter outdoor course.
LED Lighting
Now, let’s talk about the real game-changer—LED lights. They’ve become the standard for go-kart tracks everywhere, and for good reason. LEDs offer high brightness levels, instant start-up with zero flicker, and highly customizable beam angles. You can fine-tune brightness to specific zones, like turns, pit lanes, and starting grids, which improves both safety and racing performance.
The efficiency numbers speak for themselves: high-end LED floodlights can deliver up to 180 lumens per watt, compared to 80–100 lm/W from older systems. That means you get nearly double the light output for the same amount of electricity. And since LEDs maintain over 90% of their brightness even after 20,000 hours, you won’t have to worry about uneven lighting as they age.
Another big plus? Smart control options. Many tracks now use dimming systems and motion sensors to reduce energy use when the track isn’t in full operation. For example, during maintenance hours, lights can drop to 30% output automatically and ramp back up before a race.
Go-Kart Track Lighting Layout Guide
Once you’ve nailed down the lighting principles, the next question is—how do you actually set everything up? The layout is where design turns into performance. The way you position, angle, and space the lights has a direct impact on how smooth the track feels for drivers and how safe it is during high-speed races. The setup varies depending on whether you’re working with an indoor circuit or an outdoor track, but some solid guidelines can help you plan effectively.
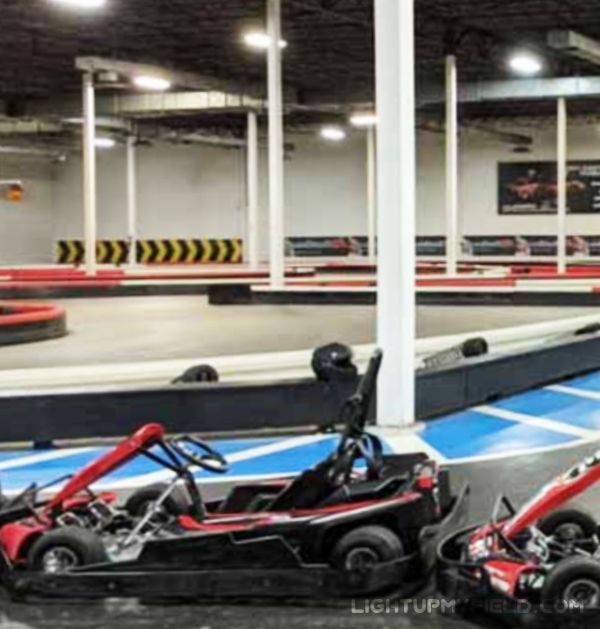
Indoor Track Lighting Layout
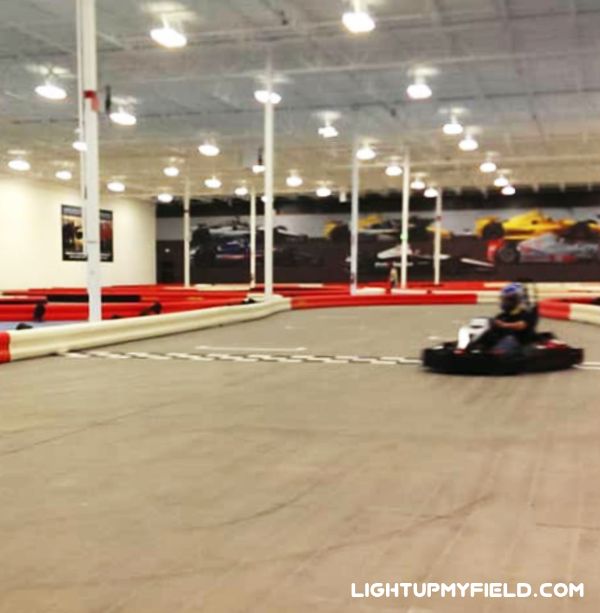 Indoor go-kart tracks are often compact and full of tight corners, ramps, and overlapping lanes. Since there’s no natural light inside, every lumen has to come from artificial sources. Most indoor tracks use ceiling-mounted or truss-mounted LED high-bay lights that provide even coverage across the asphalt and barriers.
The spacing between fixtures typically falls in the range of 6–10 meters, depending on ceiling height and beam angle. The mounting height usually sits between 5–7 meters, which helps the light spread evenly without creating harsh shadows. For example, a 500-meter indoor circuit might need around 40–60 LED lights strategically positioned along the racing lines and corners to maintain consistent brightness.
When it comes to wattage, the choice depends on your track’s size and brightness goals. 150W LEDs are often enough for small recreational tracks, while larger or competition-grade tracks may need 250W–300W fixtures to hit the target brightness. Most facilities aim for 300–400 lux across the main driving lanes. That ensures drivers can spot braking zones, barriers, and overtaking lines even at top speed.
Designers also make sure that beam overlap is part of the plan. Each light should slightly cross over the next to eliminate shadows—especially important in hairpin turns and tunnel sections where visibility drops fast. The lighting layout software used for simulation (like Dialux or AGi32) usually visualizes this overlap to check if illumination stays consistent across the entire track surface.
Besides the track itself, other zones like pit lanes, waiting areas, and spectator stands also need attention. Pit lanes should maintain around 200–300 lux, while waiting and viewing areas can go slightly lower, around 100–200 lux. That keeps the atmosphere balanced—bright where safety matters most, and softer where comfort counts.
Some modern indoor facilities even add colored LED accent lights along the barriers or under bridges for a more exciting look. While these don’t add to visibility, they definitely enhance the vibe, especially during night races or private events.
Outdoor Track Lighting Layout
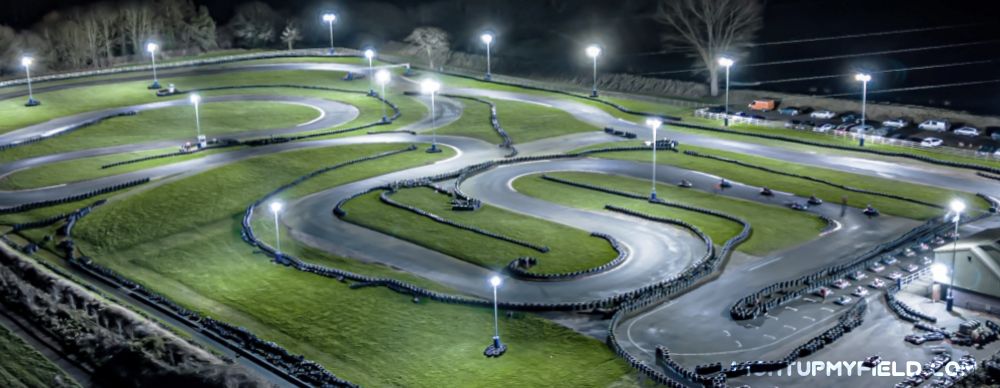
Outdoor go-kart circuits bring a different challenge: long distances, open spaces, and weather exposure. Here, the lights are usually mounted on tall poles placed around the track’s perimeter, aimed inward at specific angles to achieve even illumination without glare.
Pole height typically ranges between 8–15 meters, depending on how wide the track is and how many curves it has. The general rule is simple: taller poles reduce shadows but require stronger lights. A height of around 10–12 meters works well for most professional outdoor tracks because it balances coverage and intensity.
Pole spacing usually sits around 25–30 meters apart, and the fixtures are angled between 15°–30° downward toward the track center. Each light’s beam should overlap slightly with the next to maintain smooth, uniform brightness. On a 700-meter circuit, that might mean installing 25–30 poles with two or three fixtures each, depending on track shape and lighting power.
The target brightness for outdoor tracks usually ranges from 300 to 500 lux, depending on the purpose. Recreational night racing might be fine at 300 lux, but professional-grade events often need closer to 500 lux for better visibility and camera capture. For karting championships or televised races, lighting uniformity (above 0.6) is crucial, ensuring that no dark zones mess with the driver’s line of sight or broadcast visuals.
As for wattage, most outdoor installations use 400–600W LED floodlights, delivering enough punch to cover wide stretches of track. High-end LED floodlights produce around 160–180 lumens per watt, so a 500W light can output close to 80,000 lumens—more than enough for high-speed visibility across a 30-meter span. To reduce energy use, many facilities adopt smart lighting systems with dimming and scheduling functions, automatically lowering brightness when sections aren’t in use or during off-peak hours.
If you’re building near residential areas, it’s also smart to add anti-glare visors or asymmetric lenses on outdoor fixtures. They help keep the light focused on the track and prevent light pollution from spilling into nearby properties. Some tracks also use warm-to-neutral white LEDs (4000–5000K) for outdoor setups, which still provide great clarity without looking too harsh under the night sky.
| Category | Parameter | Value / Range | Units |
|---|---|---|---|
| Indoor Track | Fixture Spacing | 6–10 | meters |
| Mounting Height | 5–7 | meters | |
| Number of Fixtures (500 m track) | 40–60 | lights | |
| Fixture Wattage | 150–300 | W | |
| Outdoor Track | Pole Height | 8–15 | meters |
| Typical Pole Height (Pro Tracks) | 10–12 | meters | |
| Pole Spacing | 25–30 | meters | |
| Fixture Tilt Angle | 15°–30° | degrees | |
| Number of Poles (700 m track) | 25–30 | poles | |
| Fixtures per Pole | 2–3 | lights | |
| Fixture Wattage | 400–600 | W |
Combining Functionality and Aesthetics
Lighting layout isn’t only about performance—it’s also part of the overall experience. A well-designed setup gives the track a professional look that excites drivers the moment they line up at the grid. Thoughtful fixture placement along starting lines, pit stops, and finish zones adds to that authentic racing feel.
For larger complexes with spectator seating or café areas, accent lighting can be layered in to separate racing zones from relaxation spots. Some facilities even integrate RGB lighting systems for themed events, allowing dynamic color changes along barriers or tunnels—pretty cool for night tournaments or corporate races.
Tips for Successful Lighting Design

Getting the lighting design right isn’t just about using the brightest fixtures or stacking up watts. It’s about strategy, testing, and practicality. A few well-thought-out moves can make your setup not only look more professional but also perform better and last longer in real-world racing conditions.
Simulate Before You Install
Before a single light goes up, it’s smart to simulate the lighting layout. Using design software like Dialux or AGi32—or working with someone who can—lets you test how light spreads across your track before buying anything. These simulations show where shadows might form, how bright each section will be, and what the total energy draw looks like. For example, you can see if that tricky chicane at the far corner gets enough coverage or if your pit lane needs an extra fixture or two.
A good simulation can also save thousands in rework costs. Adjusting fixture angles digitally is way cheaper than moving physical poles or rewiring lights after installation. You’ll also get a clear prediction of average lux levels, which is key to keeping your setup within recommended brightness standards—usually 300–500 lux for professional tracks.
Make Maintenance a No-Brainer
Once the lights are up, the real challenge is keeping them running at full performance. Go-kart tracks, especially indoor ones, get dusty, oily, and smoky over time. That grime slowly coats fixtures, cutting brightness by as much as 10–20% after a few months if not cleaned regularly. Choosing fixtures that are easy to reach, wipe, and maintain can save you from constant downtime.
For this reason, go for LED lights with sealed housings (rated IP65 or higher). They’re dustproof, waterproof, and way easier to keep clean than open-style fixtures. Outdoor circuits especially benefit from corrosion-resistant aluminum bodies and tempered glass covers that can handle humidity and heat. Some facilities even set up a quarterly cleaning schedule to maintain brightness levels—small effort, big payoff.
Keep Color Temperature Consistent
Another underrated but super useful tip is to stick with one color temperature throughout the entire track. Mixing warm and cool white lights might sound creative, but in reality, it can mess with a driver’s focus and depth perception—especially when they’re zipping through sections at 80 km/h. Imagine entering a turn that suddenly shifts from 4000K to 5700K—it feels disorienting and breaks rhythm.
Most professional go-kart venues standardize their color temperature to around 5000K, which mimics daylight. It’s bright, sharp, and helps both drivers and cameras pick up details clearly. Keeping things uniform also gives your track a clean, consistent look that feels more polished and visually appealing for spectators and photographers.
Add Some Style to the Setup
Lighting isn’t just about visibility—it’s also part of the atmosphere. If you’re running a commercial or competition-grade track, consider adding accent or aesthetic lighting around key areas like barriers, pit lanes, and the finish line. These lights don’t need to be as bright as the main fixtures, but they can add depth and personality to the space.
Some venues use RGB LED strips along the edges of barriers or bridges for a futuristic vibe, or highlight logos and sponsor signs with soft floodlights. It’s not just for looks—better visibility around pit zones and audience areas makes the space safer too. Keeping the brightness around 100–200 lux in these zones is usually ideal. When done right, these small details can make your venue stand out online and in person, giving visitors that “wow” factor the moment they step in.
Plan for Flexibility and Future Upgrades
Tracks evolve—new turns, expanded lanes, upgraded pits. That’s why it’s smart to design a flexible lighting system from the start. Using modular LED fixtures or adjustable mounting brackets lets you tweak the setup as the track grows. Adding a smart control system—like programmable dimming or motion-based sensors—also gives you better control over energy use and ambiance.
You can even program lighting “modes” for different situations: full brightness for races, softer levels for maintenance, or dynamic lighting for events and celebrations. Systems like these can reduce power use by up to 40%, paying off over time while making your setup future-proof.
Conclusion
Good lighting can completely transform a go-kart track—from how safe it feels to how fun it is to drive. When the layout, brightness, and color are all well-balanced, drivers see better, react faster, and enjoy every lap more. By planning ahead, choosing the right type of fixtures (definitely LED), and following proper design principles, you’ll end up with a setup that looks great, performs even better, and doesn’t drain your power bill.
In the end, it’s not just about lighting the track—it’s about creating the perfect racing atmosphere that keeps drivers coming back for more.