A well-lit horse arena isn’t just about making things bright enough to see—it shapes the way riders and horses feel, move, and perform. Poor lighting can cause shadows, glare, or uneven spots that distract both horse and rider. On the other hand, a smart lighting plan can make an arena feel open, clear, and comfortable, even during night events. Whether you’re designing for a backyard practice ring or a full-sized competition facility, it all comes down to balancing brightness, consistency, and comfort.
What does lighting design mean, and why does it matter for a horse arena?
More than just “putting up some lights”
Lighting design is basically your game plan for how the arena will be lit. It’s not just about buying a couple of bright fixtures and calling it done. A proper design looks at how much light you actually need, what type of fixtures make sense, and where each one should go so the entire riding surface is lit evenly from every angle.
It takes into account mounting height, beam angle, fixture wattage, and even color temperature. For example, a 200 × 80 ft arena aiming for 200 lux across the floor needs about 320,000 lumens total, which could mean 16 fixtures at 20,000 lumens each. Without that planning, you risk having some areas overlit and others too dark, which isn’t just inconvenient—it can be unsafe.
Why horses and riders notice the difference
For horses, lighting can change how they move and react. They see motion better than humans but take longer to adjust between bright and dark areas. If the arena has a patch that’s 300 lux next to one that’s only 100 lux, a horse might hesitate, shorten its stride, or even refuse a jump. Sudden glare can also affect their depth perception, making distances harder to judge.
Riders depend on consistent light to measure approach distances, spot ground poles, and read the horse’s body language. In faster disciplines like show jumping or barrel racing, where speeds can reach 15–20 mph, the reaction time is short—uneven lighting can throw off timing by fractions of a second that make the difference between a clean round and a penalty.
Comfort, safety, and performance rolled into one
A good lighting design reduces visual surprises for both horse and rider, keeps eye strain low during long sessions, and creates a space that feels inviting even at night. It’s not just about hitting a lux number—it’s about making the arena a place where everyone can focus on riding instead of squinting into shadows or dodging glare.
How to design horse arena lighting that really works
Brightness – getting the lux and foot-candles right
Light levels are usually measured in lux if you’re using the metric system, or foot-candles if you’re in the imperial world. Both basically tell you how much light is actually hitting the ground where you ride.
For horse arenas, a good starting point is around 150–200 lux (14–19 foot-candles) for general riding or schooling. If you’re hosting competitive jumping or barrel racing, you’ll probably want 200–300 lux (19–28 foot-candles) so obstacles are crystal clear even at speed. Sports like reining, where horses can hit speeds of 15–20 mph during spins and slides, often work best closer to the 250–300 lux mark.
To put it in everyday terms, a cozy living room might be about 100–150 lux, and an office workspace might be 300–500 lux. Arenas don’t need to feel like a blinding sports stadium, but you absolutely want to avoid those shadowy patches that make a horse’s eyes work overtime.
Lighting uniformity – keeping things consistent
Uniformity is all about how evenly the brightness is spread. It’s measured as the ratio of your lowest brightness reading to your highest. If your brightest spot is 250 lux and your darkest corner is 125 lux, you’ve got a ratio of 0.5—and that’s actually right where you want to be.
For arenas, a uniformity ratio of 0.5 or better usually feels smooth to the eye and to the horse. Anything lower than that can lead to dark “holes” and sharp bright zones. Those sudden changes can make a horse hesitate or misjudge a jump distance, which is the last thing you want in a fast round.
Color temperature – finding the right look and feel
Color temperature, measured in Kelvin (K), changes how “warm” or “cool” your light appears. Most arenas look and feel best in the 4000K to 5000K range, which is pretty close to natural daylight. At 5000K, colors like red poles or white dressage letters stand out more clearly, making it easier for riders and judges to see details.
Go too warm—under 3500K—and you get a yellow tint that can make distances harder to read. Go too cool—above 6000K—and the space can start feeling harsh, even tiring on the eyes during long training sessions.
| Category | Numbers |
|---|---|
| Brightness (Lux) | 150–200 lux (general riding), 200–300 lux (jumping/racing), 250–300 lux (reining) |
| Brightness (Foot-Candles) | 14–19 fc (general riding), 19–28 fc (jumping/racing), 23–28 fc (reining) |
| Uniformity Ratio | ≥ 0.5 |
| Color Temperature (K) | 4000K–5000K |
Glare – keeping it comfortable for horses and riders
 Glare happens when a light source is just too bright for the eyes to handle directly. For horses, glare can make them squint, shorten their stride, or even spook—especially if they’re heading straight toward a jump with the lights behind it.
Good design uses fixtures with diffusers, glare shields, or precise aiming so the light is hitting the ground, not the eyeballs. Positioning lights outside a horse’s natural line of sight, particularly near takeoff zones, is a simple but effective trick.
Lumens and watts – how much light are we talking about?
Lumens tell you how much light a fixture puts out, while watts tell you how much power it’s using. A quality LED high bay can crank out 20,000–30,000 lumens while sipping only 150–200 watts. That’s way more efficient than the old metal halide fixtures, which might burn 400–1000 watts for the same brightness.
If you’re lighting a 100 × 200 ft (30 × 60 m) arena and aiming for 200 lux, you’re looking at roughly 400,000 total lumens. That could mean 20 fixtures at 20,000 lumens each, or fewer fixtures with higher output—it depends on your beam spread and mounting height.
Figuring out how many lights you’ll need
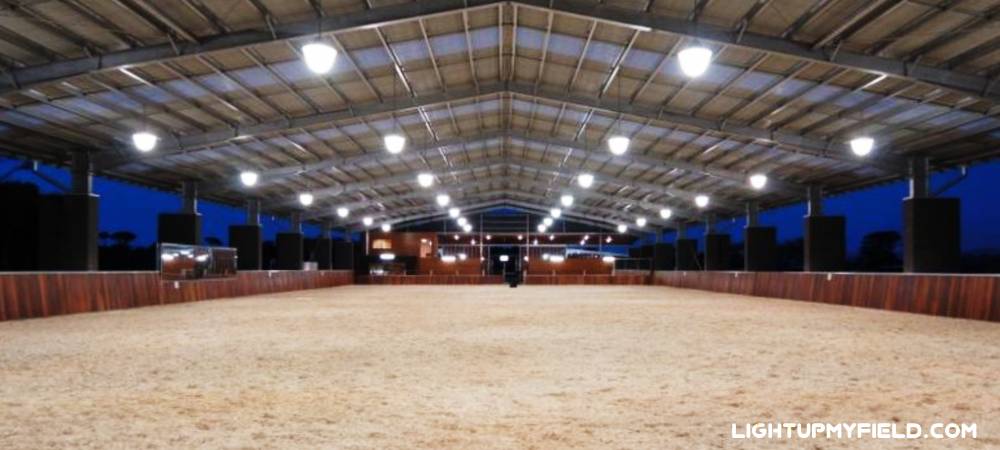
 The number of lights isn’t just about arena size—it’s about fixture strength and how the light spreads. A typical indoor setup might have 12 to 20 LED fixtures for even coverage. Outdoor arenas often need more because some of the light escapes into the surrounding space instead of bouncing back from walls.
Mounting height – poles vs ceilings
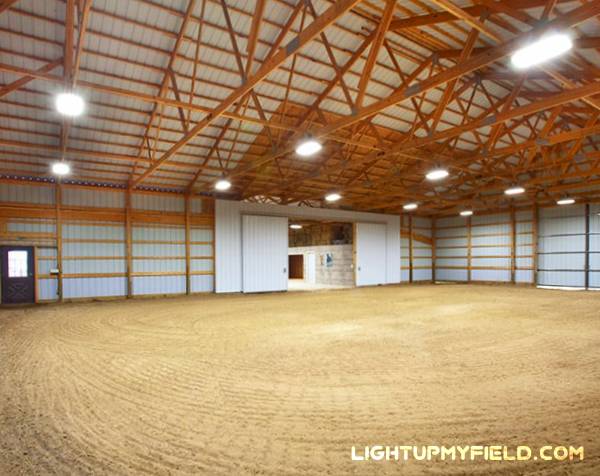
Indoor arenas usually mount fixtures to the ceiling or trusses, somewhere between 16 and 25 feet high. The higher you go, the smoother the spread—but you’ll need more powerful fixtures to compensate for the distance.
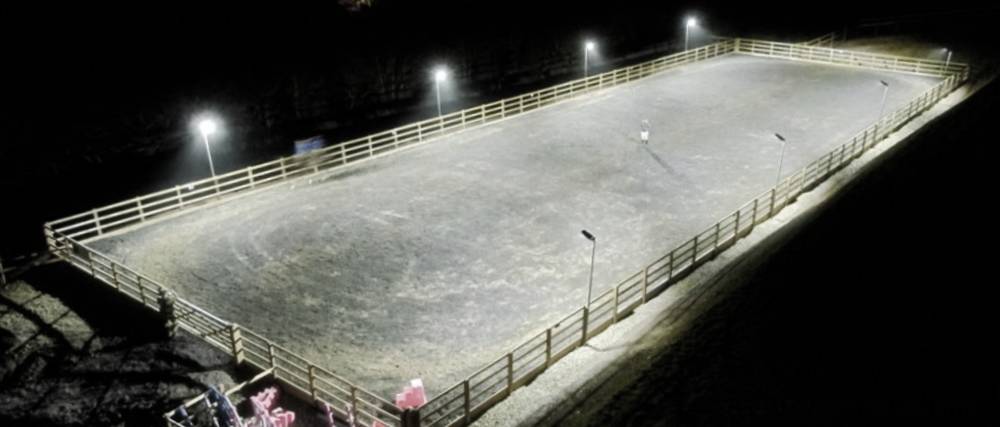
Outdoors, pole-mounted lights often sit at 20–30 feet high. Go too low, and you risk glare right in the horse’s eyes. Go too high, and you might need narrower beam angles to make sure the light still reaches the ground at the right intensity.
Permanent poles or portable towers?
Permanent poles are the way to go if you’re running events year-round—they’re stable, weather-resistant, and allow for a finely tuned layout. Portable towers are perfect for seasonal shows or multi-purpose fields, and they’re quick to move around. The trade-off? They rarely match the uniformity and stability of a permanent setup, and their height is usually more limited.
Common mistakes in arena lighting and how to fix them
Over-lighting or under-lighting – finding the sweet spot
 It’s tempting to think brighter is always better, but that’s not really the case in a horse arena. Too much brightness can wash out depth perception, making jumps and obstacles look flat. Riders might feel like they’re squinting the whole time, and horses can get distracted by overly harsh light.
If your lux readings are pushing 350 or more in an indoor setting, you’re probably over-lighting. The fix might be as simple as dimming your fixtures to 80–90% output, adding diffusers to soften the light, or switching to a slightly wider beam angle so the light spreads more gently.
On the flip side, if you’re consistently reading below 150 lux in the main riding lanes, that’s too dim for most training or competitive work. In that case, you can either increase total lumens—by adding fixtures or choosing higher-output models—or tighten the beam angles to concentrate the light where it’s needed most.
Poor spacing and aiming – why layout matters
Even the best lights in the world can perform badly if they’re not placed well. Lights spaced too far apart create dark valleys between pools of light, which can be especially tricky for horses approaching a jump from a shadowy area. Lights bunched too close together create hot spots and can cause overlapping glare that’s uncomfortable for both horse and rider.
A good rule of thumb is to space fixtures about 1 to 1.2 times the mounting height. So, if your lights are mounted 20 feet up, your spacing should be around 20–24 feet. Aiming is just as important—most arenas benefit from lights tilted slightly downward and toward the centerline, which balances the brightness across the surface and reduces light spill outside the riding area.
Ignoring glare control – it’s more than just annoying
Glare isn’t just uncomfortable—it can directly affect performance and safety. Horses have more difficulty adjusting their eyes quickly compared to humans, so riding straight toward an uncovered, high-intensity light can make them hesitate or even stop short.
If you notice riders shading their eyes or horses flinching when facing a certain direction, it’s a sign glare might be an issue. Raising the mounting height by even 3–5 feet can make a huge difference in reducing direct eye contact with the light source. Adding glare shields, using LEDs with built-in anti-glare optics, or simply tweaking the aim can help too.
Skipping uniformity checks – the hidden problem
Sometimes an arena feels bright overall, but that doesn’t mean it’s evenly lit. The human eye adjusts so quickly to brightness changes that you might not notice a corner sitting at half the brightness of the centerline until it’s measured.
A simple light meter test—taking readings every 10–15 feet in both directions—can reveal dips you didn’t know were there. For example, if your centerline measures 220 lux but your far corners are only hitting 90 lux, your uniformity ratio is around 0.4, which is below the recommended 0.5 or higher. Fixing this might mean re-aiming a couple of fixtures, adjusting spacing, or even adding a single fill light to smooth out the dark spots.
Adding smart lighting controls for more flexibility
Why controls can really change the game
Lighting design isn’t just about where the fixtures go—it’s also about how you use them. Smart lighting controls let you fine-tune brightness levels based on what’s actually happening in the arena. Instead of blasting full power every time, you could run lights at around 60–70% output for a quiet schooling session on a sunny afternoon, then crank them up to 100% for an evening jumping competition when every shadow matters.
That flexibility is especially useful if your arena gets used for very different activities. A dressage lesson at midday doesn’t need the same punch as a night-time barrel race. Having control over intensity helps keep the lighting comfortable for both horse and rider while saving a surprising amount of energy.
Motion sensors and zoning – lighting only what you need
One of the smartest tricks in the book is using motion sensors and zoning. Motion sensors make sense for smaller arenas, warm-up rings, or training areas where activity might happen in bursts rather than all day. The lights turn on only when there’s movement, and switch off or dim after a set time—no more accidentally leaving them on all night and racking up the power bill.
Zoning takes things a step further by splitting the arena into separate lighting sections. For example, if you’re hosting a clinic and only using half the arena, you can just light that half while the other stays dimmed or off. In a 200 × 100 ft arena, cutting the lit area in half could instantly reduce power use by 50% without affecting the riding experience.
The long-term savings really add up
Smart controls might cost a bit extra up front—often adding 10–15% to your initial lighting budget—but they can pay for themselves surprisingly fast. By tailoring output to actual needs and cutting down on wasted runtime, it’s not unusual to see energy savings of 20–40% over the course of a year.
For example, an arena running a 30 kW lighting setup at full blast for 4 hours a day could be using around 43,800 kWh per year. If smart controls bring that down by 30%, you’re saving more than 13,000 kWh annually. At an electricity rate of $0.12 per kWh, that’s over $1,500 back in your pocket each year—and that’s not even counting the reduced wear and tear on your fixtures, which can extend their lifespan by a couple of years.
Bringing it all together
A good horse arena lighting design blends enough brightness for safety, the right tone for comfort, and an even spread for consistency. When lux levels, uniformity, and glare control are planned from the start, both horses and riders can focus on what they came for—performing their best. Whether it’s a quiet evening hack or a championship round under the lights, the right setup makes the arena feel like it’s always ready for action.
If you’re thinking about upgrading or building a new arena, we’d love to help you design the perfect lighting plan—free of charge. No matter the size or style of your arena, our team can tailor a setup that fits your needs and budget. Just reach out, and let’s make sure your arena shines exactly how it should.