Good arena lighting changes the entire riding experience — for both horses and riders. It can make evening training sessions safer, competitions more professional, and even help prevent costly accidents. Whether the plan is to set up a small outdoor practice ring or a large competition facility, getting the lighting right from the start saves time, money, and a lot of frustration later.
Below, we’ll walk through why lighting matters, how to design it properly, what it might cost, and how to actually install it without missing key steps.
Why Lighting Matters for Horses and Riders
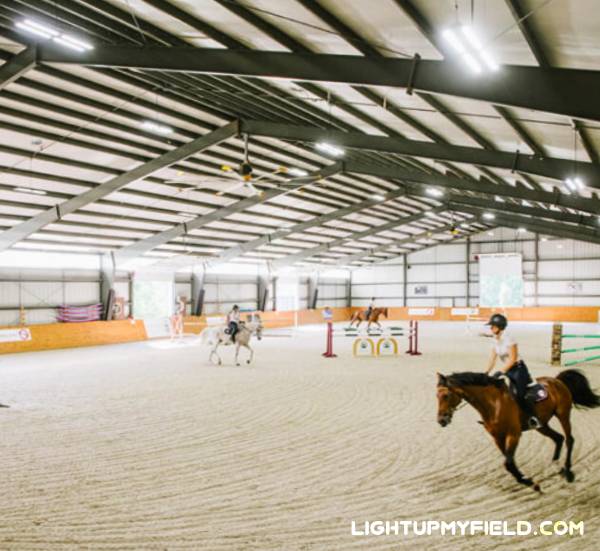 For riders, clear and even lighting means better depth perception, easier recognition of obstacles, and less eye strain during long sessions. Horses benefit too — they see differently from humans and can get startled if moving between areas of uneven brightness or shadow. If a jump is half-lit and half-dark, a horse might hesitate or misjudge it.
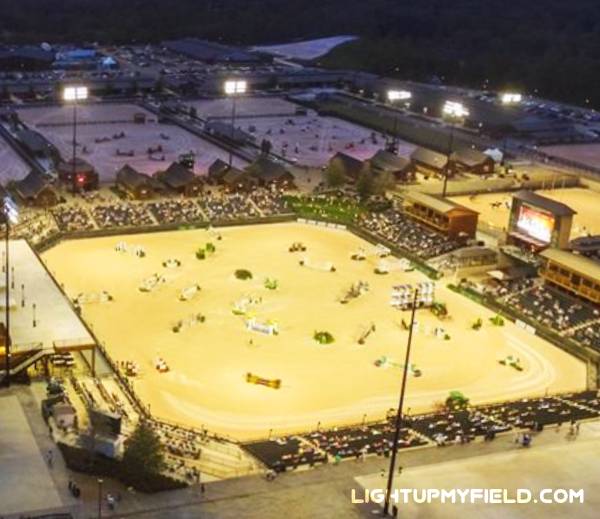
Consistent light levels also make training possible after sunset, which is a big deal in winter when daylight hours are short. For competition venues, professional-grade lighting not only meets the sport’s governing body standards but also keeps spectators and photographers happy with crisp, glare-free visibility.
Arena Lighting Design Basics
When you’re lighting a horse arena, it’s all about hitting that sweet spot between brightness, evenness, and efficiency so both horse and rider can work comfortably. It’s not just a case of throwing up a few floodlights and hoping for the best — the right setup means thinking about light levels, beam spreads, pole placement, and even how the colors look against your footing. Get it wrong, and you could end up with blinding glare across the dressage letters, deep shadows hiding one side of a jump, or wasted electricity. Get it right, and your horse canter down the long side without spooking, riders can see distances clearly to the oxer, and the footing is evenly lit from centerline to rail.
| Usage Level | Lux | Foot-Candles | Uniformity Ratio | Beam Angle | Color Temperature (K) |
|---|
| Leisure Riding / Light Schooling | 100–150 | 9–14 | 0.5–0.7 | 60–120° | ~5000 |
| Schooling / Local Shows | 200–300 | 19–28 | 0.5–0.7 | 60–120° | ~5000 |
| FEI-Level Competition | 500 | 46+ | 0.5–0.7 | 20–40° (long throw), 60–120° (width) | ~5000 |
| Televised Events | 800+ | 74+ | 0.5–0.7 | 20–40° (long throw), 60–120° (width) | ~5000 |
Light Levels – Lux and Foot-Candles

Light intensity is measured in lux in the metric world, or foot-candles (fc) if you’re using imperial. One fc is roughly 10.76 lux. The levels you aim for will depend on the type of work you’re doing in the arena.
If you’re just hacking or schooling lightly in the evenings, 100–150 lux (about 9–14 fc) is enough for a safe trot around the track without squinting. For proper schooling sessions, jump grids, or small local shows, you’ll want 200–300 lux (≈ 19–28 fc) so you can see take-off spots clearly and read your horse’s stride adjustments.
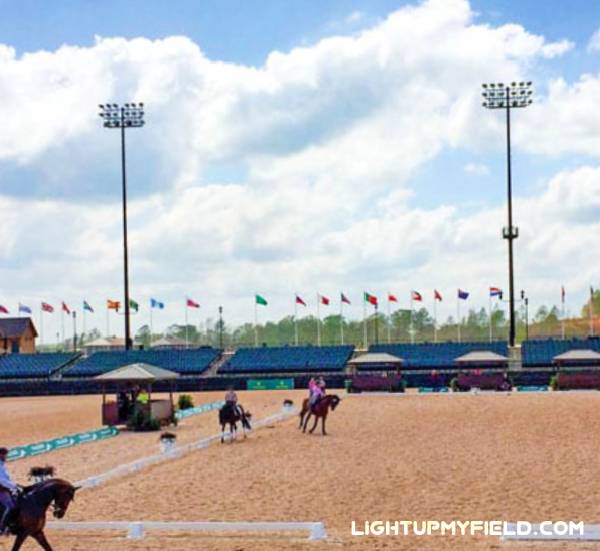
For FEI-level show jumping, dressage, or rodeo, the recommendation jumps to 500 lux (≈ 46+ fc) to make every stride, lead change, and pirouette crystal clear. And if you’re hosting a televised Grand Prix or reining competition, don’t be surprised if you need 800 lux (≈ 74 fc) or more so the cameras can catch every detail, from the position of your horse’s poll to the dust flying off the footing.
The numbers might sound big, but there’s a big difference between being able to see the arena and being able to ride into a combination at speed with total confidence.
Uniformity and Avoiding Harsh Glare
Brightness is only half the story — the uniformity of light is what stops your horse from shying at shadows. Aim for a ratio between 0.5 and 0.7, meaning your darkest spot is at least half as bright as your brightest. That way, a horse galloping from the rail into the arena’s center won’t suddenly move from bright to dim and hesitate before a fence.
Glare can also be a problem, especially if your fixtures are aimed straight at eye level for horse and rider. Glare can make a jump wing look uneven or hide footing changes in a rollback turn. The fix usually involves mounting lights high enough, using proper shielding, and aiming them just right so you can ride the short side without being blinded.
Beam Angle and Coverage
Think of beam angle like how a flashlight works. A narrow beam (20–40°) throws light down the arena length, perfect for high poles at the corners. A wide beam (60–120°) spreads light across the width, good for covering the dressage letters from A to C or making sure the far rail in a jumping line isn’t lost in shadow.
Tall poles — say 10 or 12 meters — benefit from narrower beams to get the light down to the footing without wasting spill light over the fence line. Shorter poles need wider beams to avoid patchy spots, especially in the corners where horses tend to back off if it looks darker.
Pole Numbers, Spacing, and Height
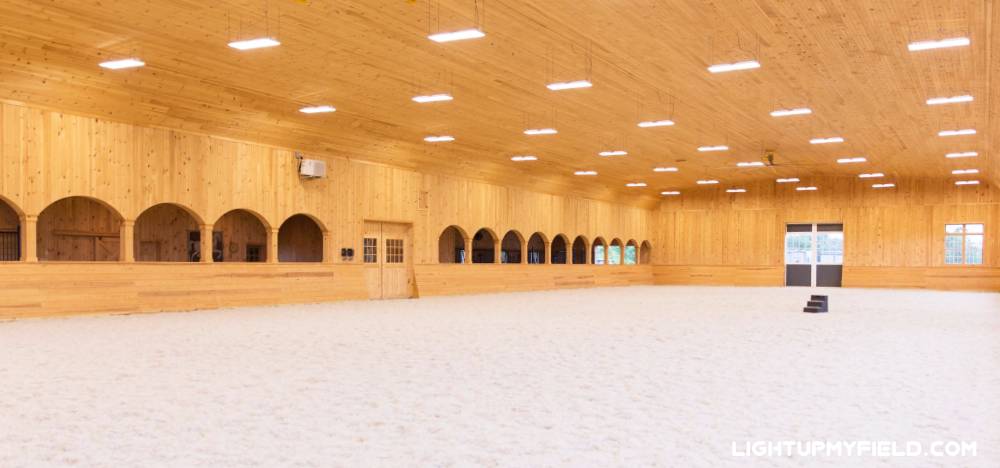
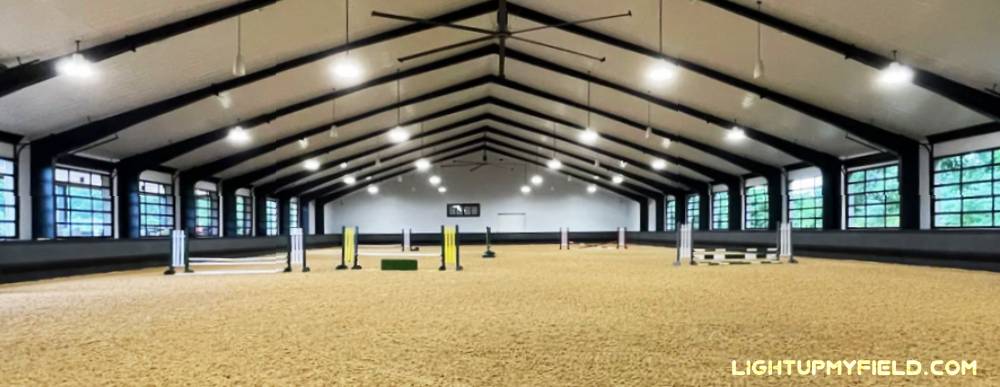
 Arena size dictates pole count. A 60×20 m dressage arena can often be covered with four poles, one in each corner, standing 6–8 m high. A 100×60 m show jumping arena may need six to eight poles at 8–12 m high to get consistent coverage for long gallop stretches and triple combinations.
Pole spacing usually runs 20–30 m apart depending on the beam spread and light strength. Too far apart and you’ll have dim “dead zones” in the middle of the arena. Too close and you’re over-lighting, which isn’t just wasted energy — it can wash out depth perception for riders approaching a fence.
How Many Lights Go on Each Pole
The number of fixtures per pole depends on your layout and target lux levels. A smaller schooling ring may get by with one or two LEDs per pole, while a competition arena chasing FEI light levels might mount three or four per pole. A 120,000-lumen LED can light up a whole long side, whereas an older 35,000-lumen metal halide might only handle one end of a diagonal line.
Color Temperature and CRI
Color temperature is measured in Kelvin (K) and decides how warm or cool the light feels. Around 5000K is ideal for equestrian work — it’s close to daylight, so you can read your horse’s stride down the centerline and clearly see rail colors on every jump.
The CRI (Color Rendering Index) tells you how accurately colors appear. A CRI of 80+ means the bay in your jump-off looks like a bay, the white rails look white, and the chestnut still gleams copper under the lights. This matters not just for judges, but for riders who rely on visual markers for timing.
Lumens, Wattage, and Efficiency
Modern LED fixtures have completely changed arena lighting. A single LED can put out 50,000–120,000 lumens using 300–1000 watts. Older metal halides could burn 1500 watts for less light — and they’d lose brightness after a season or two. With LEDs, you can often cut energy bills in half while getting brighter, steadier illumination, making every pass down the long side feel the same from start to finish.
Portable or Permanent Lighting
If you’re setting up for a weekend rodeo or seasonal evening lessons, portable lighting towers are a lifesaver. They’re quick to position, don’t need permanent bases, and can be moved to light warm-up pens or cattle holding areas.
For year-round arenas, permanent poles are the gold standard. They give consistent aiming, fixed height, and safe underground wiring, so you’re never worrying about a horse spooking at a generator or tripping over cables during a warm-up trot.
How Much Do Horse Arena Lights Cost?
There’s no single price tag for lighting a horse arena — it’s like asking how much a horse trailer costs. It all depends on arena size, the type of riding or competition you host, the quality of fixtures, and whether you’re installing it yourself or bringing in a crew with heavy equipment. The gap between a small home schooling ring for flatwork and a professional-grade competition arena that hosts FEI jumping classes can easily stretch into tens of thousands of dollars.
What Goes Into Material Costs
Your shopping list usually starts with the big-ticket items — LED floodlights to illuminate the track, poles placed along the rails, underground cabling that runs under the footing, and a control system to switch the lights on before warm-up and off after the last lap. You’ll also need mounting hardware, sturdy brackets that can handle strong winds, and in dusty outdoor arenas, weatherproof enclosures to protect the fixtures from sand kicked up by galloping horses.
High-quality LED fixtures built for equestrian use typically cost $500–$1,500 each, with the lumen output needed to light a full-size arena for canter work or show jumping. Poles can range from $500 for shorter 6 m versions used in smaller paddock arenas to $2,000 for taller 10–12 m competition-grade steel poles that throw light over oxers, verticals, and dressage letters from A to C. A basic manual control box for switching lights on after dusk might cost around $500, but more advanced smart systems with timers, dimming for cool-down sessions, and remote control from your phone can easily top $1,000.
If you’re lighting a mid-sized training arena — say 60×20 m with six poles and two lights per pole — expect $9,000–$15,000 just in fixtures and poles, before you even add wiring, trenching, and other accessories.
Installation and Labor
Hiring professionals means paying for more than just bolting lights to poles. Installation can include trenching across the arena’s perimeter track for underground wiring, pouring concrete footings strong enough to handle tall poles in high winds, upgrading electrical panels in the barn or tack room, and finally mounting and aiming the lights so the far corner near the warm-up pen gets as much coverage as the centerline.
For a medium outdoor riding arena, professional installation often runs $5,000–$15,000. If your property sits on rocky ground, needs longer wiring runs past the turnout paddocks, or requires extra-heavy poles to light a full-size 100×60 m jumping arena, expect costs to climb. For large show venues meeting TV broadcast standards, you can easily double those figures.
Ongoing Running Costs
LED technology has been a game-changer for horse arenas. Running costs are much lower than old-school metal halide lights, which could drain your wallet as quickly as a horse drains a water trough after a lesson.
For example, running six 600-watt LED fixtures for a three-hour evening schooling session uses 10.8 kWh. At $0.15/kWh, that’s about $1.62 a night — less than the price of a coffee at the showgrounds. Even at higher electricity rates, you’re looking at a small fraction of the operating costs you’d have with older lights.
Maintenance Over Time
LED fixtures often last 50,000 to 100,000 hours, which means if you ride under them 3 hours a night, 5 nights a week, they could last over 30 years before you notice a drop in brightness. Maintenance usually involves cleaning dust and footing particles off lenses, tightening mounting hardware, and inspecting wiring — all far easier than replacing burnt-out bulbs every few seasons like you would with halides or halogens.
Finding Grants or Extra Funding
Some riders and barn owners offset the expense through agricultural grants, equestrian development programs, or sports facility subsidies. In rural areas, agricultural development funds sometimes cover a portion of arena lighting costs, especially if your facility supports 4-H clubs or local pony clubs. Environmental rebates for switching to energy-efficient LEDs are also worth checking.
Community riding associations sometimes team up with councils or national equestrian federations to share funding, particularly if the arena will be used for public events, youth riding programs, or as a warm-up space for regional competitions.
Installing Horse Arena Lighting
Getting lights up in a riding arena isn’t just a matter of digging a few post holes and flipping a breaker. A well-planned setup means safe wiring, sturdy poles that can handle the elements, and light that actually lands where your horse is moving — whether that’s along the dressage track, over a triple combination, or in the far corner near the mounting block. Whether you bring in an experienced installation crew or tackle it DIY-style from the barn aisle, knowing the steps from start to finish can save you headaches down the road.
Planning Before You Dig
The first step is laying out the arena map, just like setting a jump course or marking dressage letters. Pole placement decides how evenly the light washes over the riding surface and whether you’ll end up with spooking shadows in the corners. Wiring routes also need careful planning — those cables will connect back to your barn’s electrical panel or a nearby power source, and the aiming angles should overlap so your horse’s path stays well-lit at all gaits.
In show venues or equestrian centers, you also have to think about spectator visibility and judges’ sight lines. And if your area requires permits for tall poles or electrical work, getting those signed off early can keep your project from going as sideways as a green horse on a windy day.
Setting the Foundations
Once your plan is locked in, the digging starts. Permanent installations usually call for deep concrete footings — often 1 to 1.5 meters — to anchor poles tall enough to shine light evenly from the rail to centerline. A 10–12 meter steel pole can weigh several hundred kilos, so stability is not negotiable, especially if you don’t want it swaying during a windy night schooling session.
Running the Wiring
Arena wiring almost always runs underground, tucked well away from hooves, tractor tires, and arena drags. Trenches are dug along the perimeter, conduit is laid, and cables are pulled through before the trenches are backfilled and the footing is leveled again. Going underground keeps the space safe for horses and riders while maintaining a cleaner look than overhead lines, which can be distracting or even unsafe in equestrian spaces.
Mounting and Aiming the Lights
Once the poles are set and the concrete has cured, the fixtures are mounted at their planned heights — often between 6 and 12 meters for outdoor horse arenas, depending on the beam spread needed for disciplines like barrel racing or reining. The aiming process starts with your design plan, but the real magic happens after sunset. Night testing lets you catch uneven spots — for example, a dark stretch along the rail at letter K or glare bouncing off a water jump — and adjust angles so the light coverage feels natural to both horse and rider.
Final Checks and Safety
If you’re doing part of the job yourself, remember that electrical work in equestrian facilities comes with extra safety considerations. That means using weather-rated connectors, the correct breaker sizes, and heavy-duty cabling that can handle temperature swings and moisture. Even if you’ve built plenty of horse fencing or installed barn fans, having a licensed electrician handle the final hookups is smart — it keeps your insurance intact and ensures a safe ride under the lights.
DIY vs. Professional Install
Tackling the job yourself can save thousands, but it also means you’ll be the one renting a telehandler or boom lift to raise the poles, mixing and pouring concrete footings, and operating a trencher along the arena rail. A professional crew costs more up front, but they usually finish faster, get the aiming right the first time, and often include a warranty on both fixtures and labor. If you’re prepping a showground or busy training barn, that speed and peace of mind can be worth every penny.
A Few Words Before You Flip the Switch
A well-designed lighting system is a long-term investment in both safety and enjoyment. Spending extra time in the planning stage — especially on lux levels, uniformity, and positioning — pays off every time you ride after sunset. And with today’s energy-efficient LEDs, the running costs don’t have to be a burden.
Whether the goal is quiet evening rides, high-stakes competitions, or simply making the arena usable year-round, getting the lighting right brings peace of mind and a better experience for everyone in the ring.