Designing a lighting plan for bus parking areas and wash bays isn’t something you can just wing. These spaces aren’t like lighting up a small garage or a simple driveway; they’re large, functional areas that need consistent, reliable illumination for both safety and day-to-day operations. The lighting design impacts everything—from how safely buses maneuver to how efficiently cleaning staff can work after dark.
Let’s break down how to approach this in a way that feels practical and easy to follow.
Why Proper Lighting Matters for Bus Parking and Wash Bays
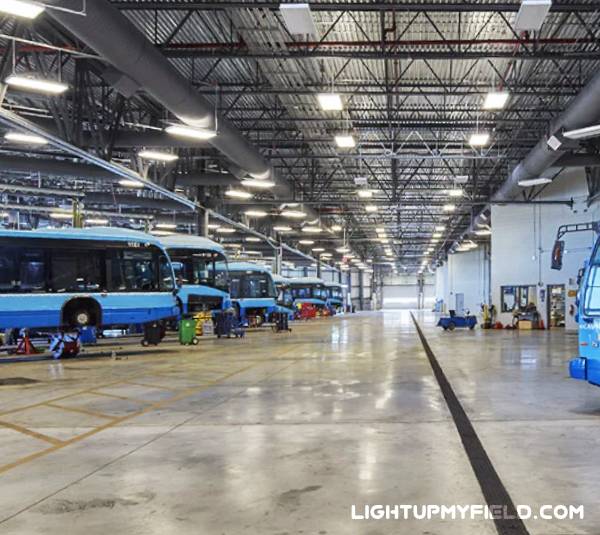
Parking areas and wash bays are work zones. In parking areas, drivers need to navigate large vehicles without collisions, often during early mornings or late nights. Wash bays, on the other hand, involve water, soap, and plenty of movement, so good visibility can prevent accidents and ensure the job gets done right. Poor lighting can lead to missed spots during cleaning, slips and falls, or even damage to vehicles.
Also, these areas often run during off-peak daylight hours. That means artificial lighting isn’t a backup—it’s the primary light source for hours at a time. That’s why a proper lighting plan isn’t just a nice-to-have; it’s a necessity for smooth operations.
Steps to Design a Lighting Plan
Getting the lighting right for bus parking and wash bays isn’t just about throwing a few fixtures up and hoping for the best. These areas have very specific needs, and a sloppy plan can lead to uneven light, safety risks, or even wasted energy. The best approach? Take it step by step and consider every factor—brightness, fixture type, placement, and even the color tone of the light. Let’s dive into each of these.
How Bright Should It Be?
Brightness is where it all begins. The amount of light you need depends on what’s happening in the space. For outdoor bus parking areas, the standard recommendation is about 30 lux for general visibility, which is enough for safe driving and maneuvering. If the parking area has tight corners or frequent bus movement, bumping it up to 50 lux can make a big difference in reducing accidents.
Wash bays, on the other hand, are a whole different story. Here, workers are scrubbing, rinsing, and checking for dirt in small crevices—even under the buses. That level of detail requires more light. A good rule of thumb is 150 to 200 lux, which is bright enough for visual tasks without creating glare.
To put these numbers in perspective, 30 lux feels like a dim hallway, while 200 lux is more like a bright living room or an office space. It’s not stadium-level brightness, but it’s enough to keep the space functional and safe.
How Many Watts Do You Need?
Now, let’s talk power. Gone are the days when wattage was the easy metric for brightness. With modern LEDs, wattage doesn’t directly equal brightness—lumens do. For example, a good-quality LED floodlight that outputs 20,000 lumens only uses around 150 to 200 watts. Compare that to old-school metal halide lights, which could draw 400 watts for the same light output. That’s a massive difference in energy costs over time.
For a typical parking area where the brightness demand isn’t sky-high, you can often get by with 100-watt LED fixtures (delivering roughly 10,000–12,000 lumens each). In wash bays, however, stick to 150–200-watt fixtures. These high-output lights will help you hit those 150–200 lux targets without crowding the ceiling with a dozen smaller fixtures.
And here’s another tip: always choose LEDs with a long lifespan, ideally 50,000 hours or more. That means less hassle with maintenance and fewer disruptions in your operations.
How Many Lights Do You Actually Need?
Here’s where the math comes in—but don’t worry, it’s straightforward. Start with the size of your area. Let’s say your bus parking lot is 1,200 square meters and you want 30 lux of brightness. Multiply the area by the lux level:
1,200 m² × 30 lux = 36,000 lumens needed.
If each LED fixture delivers about 12,000 lumens, you’ll need at least three fixtures. But that’s just the starting point. In reality, you’ll likely need five or six lights to make sure there’s no dark corner and that the coverage feels even.
Now let’s look at wash bays. If a wash bay is 100 square meters and you’re aiming for 200 lux, that’s 20,000 lumens total. With a couple of high-output LED fixtures, you’re good to go. Still, think about overlapping light beams to avoid shadows, especially where workers need to see every detail on the bus surface.
What’s the Right Spacing?
Spacing can make or break your lighting plan. Too close, and you get harsh hot spots; too far apart, and dark patches start creeping in. For outdoor parking areas, lighting poles are usually spaced 8 to 12 meters apart—that’s assuming fixtures are mounted about 8 meters high.
Here’s a simple rule: don’t let the spacing exceed 1.5 times the mounting height. So if your lights are 8 meters up, keep the spacing at 12 meters max. This ratio helps maintain even coverage and avoids overloading one area with brightness while another sits in the shadows.
Inside wash bays, mounting height is usually lower, so your spacing should be tighter. And if you have overhead rails or equipment in the way, plan around them carefully so they don’t block the light.
Which Type of Light: Floodlight or Spotlight?
Here’s the deal: floodlights are the real workhorses here. They spread light widely, which is exactly what you need for open parking spaces and large wash bays. Spotlights, with their narrow beams, are more for accent lighting—like highlighting a sign or focusing on a small area.
That said, if your wash bay has awkward corners or sheltered spots under overhangs, adding one or two spotlights can help eliminate shadow zones. But for the main illumination, stick with high-efficiency LED floodlights that deliver strong, wide-angle coverage.
What About Color Temperature?
Color temperature isn’t just about aesthetics; it affects visibility too. For parking areas, a range of 4000K to 5000K works perfectly. That’s a neutral to cool white light, which mimics daylight and helps drivers see clearly.
For wash bays, go slightly cooler—5000K to 5700K. Why? Because whiter light makes it easier to spot dirt and water spots on the bus surface. Warm light (below 3500K) might feel cozy, but it makes grime harder to see and can make the whole space look dim and yellowish—not what you want in a cleaning area.
Uniformity
 Hitting the right average lux level is great, but if half the space looks like daylight and the other half feels like a cave, you’ve got a problem. Uneven lighting isn’t just uncomfortable; it’s unsafe. The standard guideline is a maximum-to-minimum ratio of around 3:1 for outdoor spaces and 2:1 for indoor wash bays.
Uniformity isn’t only about the number of lights—it’s about positioning and aiming them correctly. Overlapping beams can smooth out the light distribution. If you’re serious about getting it right, consider running a photometric analysis. Many lighting suppliers offer this for free, and it saves a ton of guesswork (and expensive do-overs later).
Special Features to Look For
Wash bays come with their own set of challenges—water, chemicals, and heat. That means your fixtures need to be tough. Look for IP65-rated or higher fixtures, which can handle both dust and heavy water spray. Materials matter too—choose corrosion-resistant housings if the environment is humid or chemical-heavy.
Another big factor is heat. Not from the wash bay itself, but from the lights. Old-school metal halide or halogen fixtures run hot, which makes the space uncomfortable and can even shorten fixture life. LEDs, on the other hand, run cooler and often come with heat sinks to manage thermal load.
And let’s not forget glare. Drivers pulling in and out don’t need to be blinded, and neither do the staff working long hours in wash bays. Fixtures with diffusers or anti-glare designs can minimize harsh light without compromising brightness.
Tips to Achieve the Best Lighting Design
Once you’ve nailed the basics like brightness and fixture placement, there are some extra moves that can really take your lighting plan from good to great. These tips not only make the space look and feel better, but they can also save you a chunk of money over time.
Use Smart Controls to Cut Energy Costs
Lighting doesn’t have to be on full blast 24/7. Adding smart controls like motion sensors or timers can make a noticeable difference in your energy bills. For example, if your parking lot isn’t busy overnight, motion sensors can dim the lights to 30% when no one’s around and bring them back up when a vehicle enters. This alone can slash energy use by up to 40%.
If you have wash bays that only operate during certain hours, a simple timer or daylight sensor can prevent lights from running unnecessarily during the day. It’s a small investment that pays for itself pretty fast—sometimes in less than a year.
Make the Most of Reflective Surfaces
Here’s an underrated trick: let your walls and ceilings help you. Painting wash bay walls and ceilings a light color, like white or light gray, can bounce light back into the space. This isn’t just about aesthetics; it actually reduces the number of fixtures you need. Studies show that using reflective surfaces can boost effective brightness by 10–15% without adding more power-hungry lights.
So, if you were planning six fixtures, you might get away with five, and that’s an immediate cost and energy savings. It’s a low-tech solution that works surprisingly well.
Plan for Maintenance from Day One
Lighting systems don’t just need to work well on day one—they should keep performing for years without constant headaches. That’s why you should choose fixtures with easy-to-access panels and long lifespans. LEDs rated for 50,000 hours or more mean fewer replacements and less downtime. If your lights run 12 hours a day, 50,000 hours translates to more than 11 years of service life. Compare that to old-school bulbs that burn out after a year or two, and the savings become obvious.
Also, think about how easy it will be to replace a fixture if something does go wrong. If your lights are mounted 8 meters up on outdoor poles, you don’t want to bring in a boom lift every six months. Go for fixtures with simple clip-on designs or quick-release systems so maintenance is as painless as possible.
Don’t Skip Photometric Analysis
This one might sound technical, but it’s a game-changer. A photometric layout is basically a computer simulation that predicts how light will spread in your space. It shows you exactly where bright spots and dark patches will appear before you install anything. Doing this step ensures you hit your target lux levels, maintain good uniformity, and avoid wasted light.
The best part? Most lighting manufacturers will do this for you for free if you’re buying their fixtures. Skipping this step can lead to costly mistakes—like installing too many lights or not enough, then having to redo the whole setup. Spending a little time on a layout can save thousands later.
Bringing It All Together
Designing a lighting plan for bus parking and wash bays isn’t rocket science, but it does require some thoughtful planning. You’re balancing brightness, energy efficiency, comfort, and durability—all while making sure the space works for people, not just for numbers on a spec sheet. With the right combination of lux levels, fixture types, spacing, and smart controls, you’ll end up with a lighting setup that keeps operations smooth, safe, and cost-effective.