Lighting is one of those things we tend to take for granted—until it’s not done right. In a bus garage or transportation facility, the stakes are high. These spaces aren’t just storage rooms; they’re bustling work environments where safety, productivity, and operating costs are all on the line. From mechanics working on tight schedules to drivers navigating massive vehicles indoors, the right lighting makes a big difference.
So how do you plan a lighting system that checks all the boxes—bright, efficient, and budget-friendly? Let’s dive into why lighting matters so much in these facilities, how to design it properly, what installation looks like, and how you can keep costs under control without cutting corners.
Why Lighting Matters in a Bus Garage
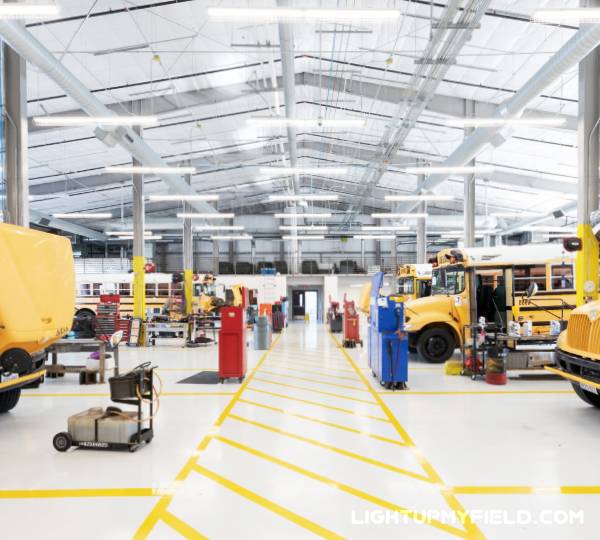 When you walk into a bus garage, it’s not just a parking lot with a roof—it’s a busy, high-stakes environment. Buses are constantly coming and going, mechanics are working on complex repairs, and staff are doing everything from fueling to cleaning. Now, imagine trying to handle all that under dim, uneven light. Doesn’t sound great, right? Lighting isn’t just about seeing better—it’s about working safer, faster, and more accurately.
Safety Starts with Visibility
Think about a mechanic working on a brake system. If the lighting is poor, spotting a worn brake pad or a tiny crack in a hose becomes almost impossible. A missed detail like that could lead to a major breakdown on the road, or worse, an accident. The same goes for drivers pulling buses into tight bays—without proper illumination, blind spots become a real hazard. Even a minor collision with another vehicle or a wall can cost thousands in repairs.
And it’s not just the big tasks that suffer. Something as basic as reading a torque spec on a tool or a label on a fluid container becomes frustrating under weak lighting. Over time, these small inefficiencies pile up and eat into productivity. You might think, “Well, we’ll just add a few more lamps.” But random fixes often lead to glare, shadows, and wasted energy. A smart lighting plan is way cheaper than paying for injuries or damaged buses.
The Numbers Don’t Lie: Lighting Standards Matter
Here’s where it gets interesting. Lighting for these spaces isn’t guesswork—it’s measured in lux (or foot-candles if you’re old school). For maintenance areas where precision matters, the recommended range is 300 to 500 lux, which translates to about 28 to 46 foot-candles. That’s roughly what you’d expect in a bright office or retail store. Why so high? Because detailed tasks need clear visibility.
Now compare that to storage or parking zones, which only need 30 to 50 lux (around 3 to 5 foot-candles). That’s like early evening daylight—just enough to navigate without tripping over something. See the difference? If you light every corner of your garage like a surgical suite, you’re burning cash. But if you keep the whole place at 30 lux, you’re asking for trouble in the repair bays. Getting these numbers right means balancing safety with efficiency.
Compliance Isn’t Optional
One more thing people often forget: compliance. Many regions have strict regulations for industrial and maintenance lighting. Fall below those minimum lux levels, and you’re not just risking accidents—you’re opening the door to fines, insurance issues, and liability headaches. Imagine an accident happens, and the investigation shows your lighting was below standard. That’s a lawsuit waiting to happen.
On the flip side, good lighting can actually reduce your insurance premiums. Why? Because insurers love anything that lowers risk, and a well-lit garage is a safer garage. So, the cost of a proper lighting setup? It’s peanuts compared to what you could lose from one serious incident.
Planning the Lighting Design for a Transportation Facility
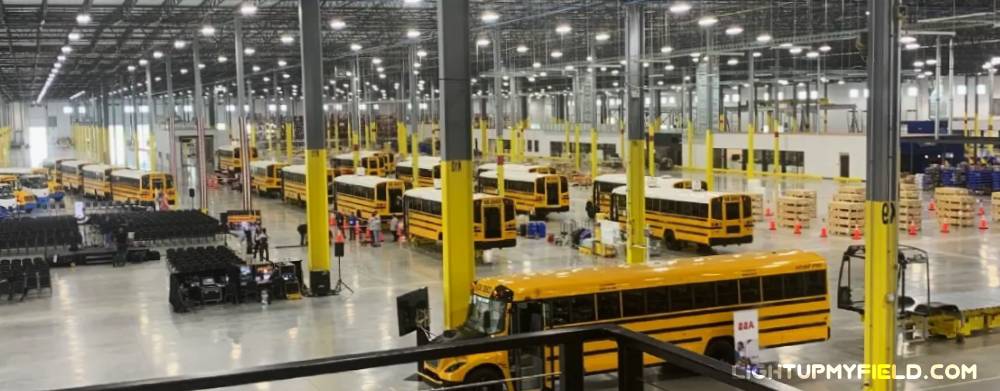
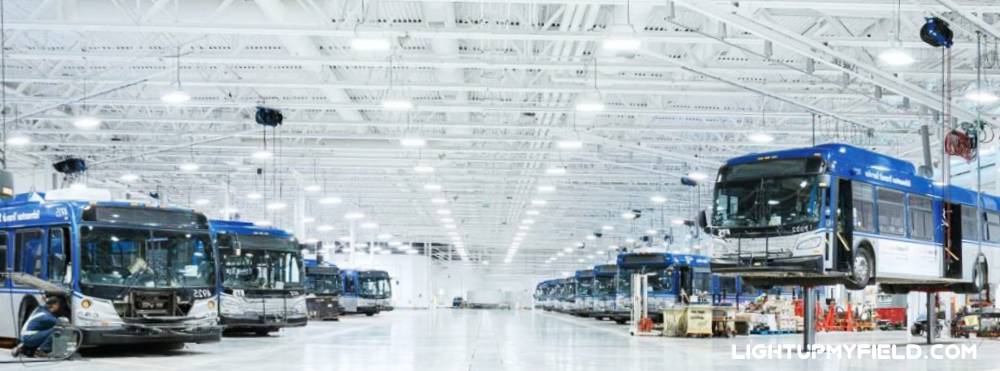
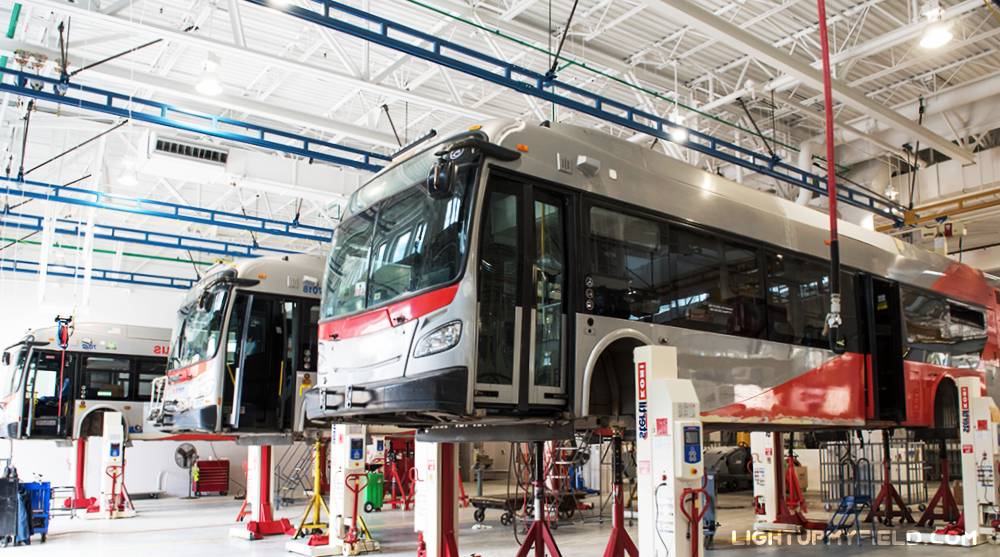
Getting the lighting plan right in a transportation facility isn’t something you can rush through. These places aren’t small, cozy workshops—they’re huge, open spaces with different zones, each having its own lighting needs. You’ve got high ceilings, vehicle movement, tight maintenance work, and even wet environments like wash bays. Throwing up a few lights and hoping for the best just won’t cut it.
Figuring Out the Right Brightness Levels
One of the first things to dial in is how bright each area needs to be. Lighting intensity is measured in lux (or foot-candles if you prefer the imperial system), and the numbers here really matter. For example, maintenance bays need about 300 to 500 lux—that’s bright enough for detailed inspections and hands-on repairs. Think of it like the difference between working under a desk lamp versus a well-lit office. You want mechanics spotting worn brake pads, tiny cracks, and leaking seals without straining their eyes.
Other areas don’t need that much punch. Bus wash zones usually sit around 150 to 200 lux, and storage or parking spaces can be as low as 30 to 50 lux. To put that into perspective, 30 lux is similar to twilight or an old-school streetlamp—good enough for navigating but not for delicate work. Over-lighting is just as bad as under-lighting—it burns money on energy and creates glare that makes it harder to see.
So how do you figure out the right layout without guessing? Photometric analysis is your secret weapon. Most lighting suppliers will run this simulation for free if you’re buying fixtures from them. It maps out how light spreads across your space, factoring in ceiling height, fixture type, and mounting positions. This is what keeps you from ending up with dark corners or hot spots that waste energy. For a big garage—say 25,000 square feet—you might find that 55 properly spaced fixtures do the trick instead of 70 randomly placed ones. That’s a big cost difference over time.
| Lighting Design Element | Recommended Range / Value | Functions |
|---|
| Maintenance Bays Brightness | 300–500 lux (≈ 28–46 foot-candles) | For detailed inspections and repair work |
| Bus Wash Zones Brightness | 150–200 lux | Suitable for wet environments |
| Storage/Parking Brightness | 30–50 lux | Similar to twilight; good for navigation |
Choosing the Right Color Temperature
Brightness is one thing, but color temperature also plays a huge role in how a space feels and functions. Most bus garages stick to neutral to cool white light, somewhere between 4000K and 5000K. Why? Because that range gives you excellent color rendering, which is a fancy way of saying you can see true colors. That’s vital when checking wiring colors or spotting fluid leaks.
Anything too warm—say 3000K—starts to feel cozy and dim, like a living room lamp. That might sound nice, but it’s a terrible choice for a maintenance bay. On the flip side, going too cool (above 6000K) can feel harsh and even cause eye strain during long shifts. A balanced 4000K to 5000K is the sweet spot for keeping workers alert without making the place look like a cold warehouse.
Managing Glare for Worker Comfort
If you’ve ever walked into a shop with shiny floors and blazing LEDs, you know what glare feels like. It’s not just annoying—it can lead to headaches, eye strain, and even accidents. Glare happens when light bounces off reflective surfaces or comes directly from poorly designed fixtures. In a bus garage, this is pretty common because of glossy floors, polished bus panels, and even big windows.
The fix? Go for fixtures with diffusers, frosted lenses, or glare-control optics. These help spread the light evenly and cut down on sharp, blinding beams. If you’re investing in LEDs, make sure the design isn’t just about lumens—check for glare ratings too. A well-designed LED can still be brutal if it’s mounted wrong or lacks proper shielding.
High Bay vs. Low Bay Fixtures
Another big decision: high bay or low bay lighting. This isn’t about style—it’s about ceiling height. Most bus garages have ceilings 20 feet (6 meters) or higher, which means high bay fixtures are your best friend. These lights are engineered to throw powerful beams downward, so you get bright, even light on the floor without losing intensity.
For ceilings under 20 feet, low bay fixtures work just fine. If you mix them up—say, using low bays on a 25-foot ceiling—you’ll end up with dim patches that hurt productivity and create safety hazards. On the other hand, blasting a low-ceiling space with high bays can cause glare and wasted energy. Matching the right fixture to your ceiling height can save thousands in both installation and operating costs.
Getting the Power and Wiring Right for Bus Garage Lighting
Installing lights in a bus garage is more than just hanging a few fixtures on the ceiling. The backbone of a good lighting system is proper power supply and wiring, and getting this part right from the start can save a lot of headaches down the road.
How Much Power Are We Talking About?
Let’s run some quick numbers so this feels real. A typical LED high bay fixture for a transportation facility draws around 150 to 200 watts. If you’ve got a medium-sized garage needing 50 fixtures, that’s 7.5 to 10 kilowatts of lighting load. Compare that to old-school metal halides, which often chew up 400 watts per fixture—you’d be at 20 kilowatts or more for the same space. That’s why LEDs are such a game changer on energy savings.
But here’s the thing: even if you’re switching from metal halide to LED, you still want an electrician to double-check your existing electrical infrastructure. Older panels, outdated wiring, or undersized circuits can cause voltage drops or even trip breakers when everything kicks on at once. It’s way easier (and cheaper) to upgrade the system during installation than to deal with downtime later.
Thinking Ahead with Controls
Now let’s talk controls—dimmers, motion sensors, daylight sensors—these aren’t just fancy add-ons anymore. They’re a big part of squeezing extra efficiency out of your setup. Motion sensors in low-traffic zones can cut energy use by 30–40%. Daylight sensors near skylights or big garage doors can trim another 10–15% because they automatically dim the lights when natural light is doing the job for free.
The catch? You need to integrate these controls during the initial install, not as an afterthought. Retrofitting sensors later usually means tearing into conduit or rewiring sections, which drives up labor costs. If you’re going all-in with a centralized control system, plan your data cables alongside power lines. It’s a little extra work upfront, but it keeps everything neat and functional.
Installation Costs—What’s the Damage?
This is the part most people really want to know. Expect to pay somewhere between $150 and $300 per fixture for installation, and that includes mounting, wiring, and basic setup. For a 50-fixture project, you’re looking at $7,500 to $15,000 in labor alone. Need extra electrical panels, long conduit runs, or new breakers? Add a few thousand more.
Here’s a tip: if you’re already planning a major electrical upgrade—say adding EV chargers for your fleet—try to bundle that work with your lighting project. Doing it all at once often means better pricing from contractors and less disruption to your facility.
How Much Does It All Cost and Where Does the Money Come From?
Lighting upgrades for bus garages sound expensive upfront, but the long-term savings are massive—and there are ways to make the numbers work without draining your budget all at once. Let’s break it all down with some real figures.
Fixture and Installation Costs
First, the big question: how much do the lights themselves cost? A solid LED high bay fixture for a garage typically runs between $250 and $450 each, depending on the brand, lumen output, and features like integrated controls. If your garage needs 50 fixtures, you’re looking at $12,500 to $22,500 just for the lights.
Now factor in installation. Labor isn’t cheap, and for industrial spaces, it rarely is. Most contractors will charge $150 to $300 per fixture for mounting, wiring, and setup, which adds another $7,500 to $15,000. Put it all together, and a medium-sized project will probably land somewhere in the $20,000 to $35,000 range, and that’s before you add smart controls or extra electrical upgrades.
The Payoff: Operating Costs and Energy Savings
Here’s where LEDs start to feel like magic. A typical 400-watt metal halide actually burns closer to 455 watts with the ballast included. If those lights run 12 hours a day, 365 days a year—and many bus facilities do—that’s just under 2,000 hours per year per fixture, which costs about $240 annually per fixture at $0.12/kWh. Multiply that by 50 fixtures, and you’re dropping about $12,000 every single year just to keep the lights on.
Now, swap those out for 150-watt LEDs, and your annual cost per fixture plunges to about $79. For 50 fixtures, that’s $3,950 per year. You just saved over $8,000 annually on energy alone, and that doesn’t even include lower maintenance costs. Those old metal halides need new bulbs every 2–3 years at around $70–100 a pop, plus labor. LEDs? They’ll last 50,000+ hours—easily 10 years in this environment—so you’re barely touching them once installed.
When you look at it that way, a $25,000 project paying for itself in 3–4 years sounds a lot better, doesn’t it? After that, it’s all pure savings—easily tens of thousands over the next decade.
Funding Options: How to Make It Easier on Your Budget
If those upfront costs feel like a mountain, you’ve got options. Utility companies often offer rebates for energy-efficient upgrades, and these can knock 10–30% off your bill right away. Many states also have incentive programs for reducing energy use in industrial and transportation facilities, so it’s worth checking what’s available locally.
Still tight on cash flow? Some lighting vendors provide financing or lease-to-own plans, letting you spread the investment over a few years while you start pocketing those energy savings immediately. In some cases, the savings on your monthly energy bill can even cover most of your financing payment, which makes the upgrade feel almost cost-neutral from day one.
What Features Should You Look for in Bus Garage Lighting?
When it comes to lighting for a bus garage, not all LEDs are built the same. Picking the wrong ones can cost you big in maintenance, energy bills, and even safety issues. So, what should you really pay attention to?
Lifespan That Actually Lasts
If you’re climbing up to swap bulbs every two years, you’ve already lost the game. Go for fixtures rated for at least 50,000 hours—but 100,000 hours is even better. At 12 hours of daily use, 50,000 hours gives you about 11 years before you even think about replacements. Compare that to metal halides that barely make it past 15,000 hours—you’d need three replacements in that same timeframe. Each one eats into your budget and your maintenance schedule.
Efficiency and Lumen Output
Brightness matters, but efficiency matters just as much. A good rule of thumb is aim for 130 lumens per watt or higher. So, a 150-watt LED high bay should give you at least 19,500 lumens. That level of efficiency not only lights up your space properly but also saves thousands on energy bills every year. Lower-efficiency lights might be cheaper upfront, but they’ll bleed you dry over time with extra power costs.
Built for a Rough Environment
Bus garages aren’t gentle places—they’ve got dust, exhaust fumes, occasional water from bus washes, and temperatures that swing from freezing to sweltering. If your lights can’t handle that, they won’t last. Look for an IP65 or higher rating. That means the fixture is sealed against dust and can resist water jets—perfect for a garage that sees constant washdowns and moisture. Bonus points for fixtures that offer IK impact resistance, so a bump from a ladder or tool doesn’t take them out of commission.
Smart Controls Compatibility
This is where the future-proofing comes in. Even if you don’t plan to use motion sensors or dimming controls right away, you want the option later. Why? Because smart controls can shave another 20–40% off your energy costs. If your fixtures aren’t built to integrate with sensors or a building automation system, adding that later is a nightmare—and often more expensive than just buying compatible fixtures upfront.
So before you buy, check: Can they work with motion sensors, daylight harvesting, and wireless controls? If yes, you’re set for future upgrades without a huge hassle.
Bright Spaces, Lower Costs – Why Smart Lighting Pays Off
Good lighting in a bus garage is about making the space safer, more productive, and less expensive to run. When you invest in a solid design, energy-efficient fixtures, and smart controls, you’re not just buying lights—you’re buying years of savings and fewer headaches.
Whether you’re building a new facility or upgrading an older one, every choice you make now—brightness levels, color temperature, fixture type—has a long-term impact. Plan it right, and your garage will run better, look better, and cost a whole lot less to keep bright.