The layout, the spacing, and even the angle of the lights all play a big role in how well the space functions after dark. The question many shipyard managers ask is: what’s the ideal spacing between dry dock floodlights? If the lights are too far apart, you’ll get dark patches that make work harder and less safe. If they’re too close, you waste energy and risk creating glare that blinds workers. Let’s break this down and see what works best.
What is Spacing Between Floodlights and Why It Matters
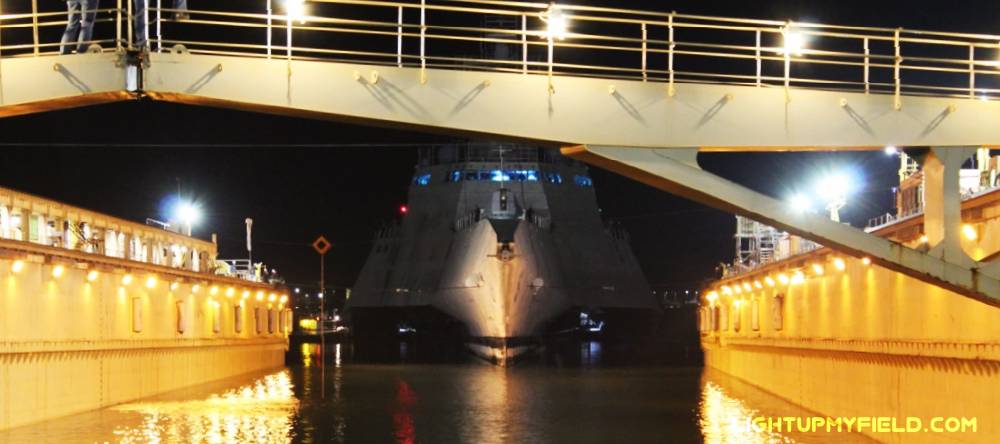
When we talk about spacing between floodlights, we’re referring to the distance from one light fixture to the next along a line or perimeter. This spacing determines whether your lighting coverage is uniform or uneven. Think of it like painting a wall: if you leave gaps between brush strokes, the result looks patchy. Lighting works the same way. The aim is to eliminate harsh shadows and avoid bright hot spots, creating a smooth, even spread of light.
Dry docks are busy zones. Workers are often dealing with steel plates, scaffolding, and equipment that can block light and cast shadows. If your floodlight layout leaves big gaps, you create potential blind spots where accidents can happen. According to industry safety reports, poor illumination accounts for a significant share of slips, trips, and operational errors in heavy industrial environments. Uniform lighting reduces that risk by making sure people and hazards are visible from every angle.
There’s also the question of comfort. Glare isn’t just annoying; it can cause eye strain and fatigue over a long shift. Bad spacing often causes lights to overlap too much in one area while leaving another area dim. Proper spacing strikes the right balance so workers can see clearly without feeling like they’re staring into car headlights.
Recommended Dry Dock Floodlight Spacing
So, what’s the magic number for floodlight spacing in dry docks? Honestly, there isn’t a single universal figure because spacing depends on several things like mounting height, beam angle, and the brightness levels you’re aiming for. Still, there are some well-tested guidelines that shipyards around the world rely on.
| Mounting Height (m) | Recommended Spacing (m) | Typical Beam Angle |
|---|---|---|
| 20 | 60 – 80 | 60° – 90° |
| 25 | 75 – 100 | 60° – 90° |
| 30 | 90 – 120 | 60° – 90° |
| 35 | 105 – 140 | 60° – 90° |
Why Mounting Height Changes Everything
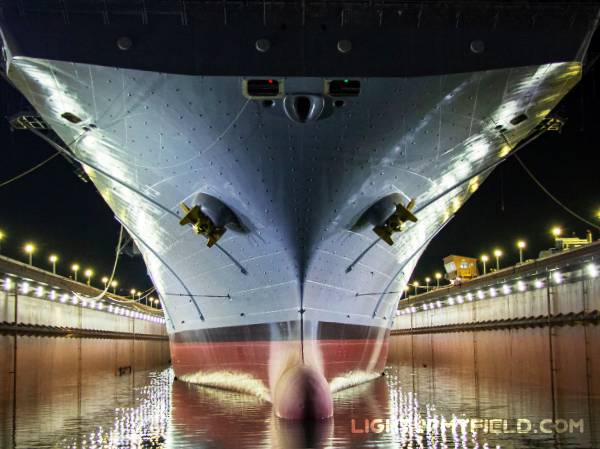
Most dry docks use high-mast lighting systems, and those poles are usually between 20 meters and 35 meters tall. Here’s why height matters: the higher you mount your lights, the wider the light beam can spread, which means you can space your poles farther apart without creating dark zones. If the poles are too low and spaced too far apart, you’ll end up with uneven light, bright spots under each fixture, and shadows everywhere else.
A widely used rule of thumb is this: spacing should be around 3 to 4 times the mounting height. So, if your poles are 25 meters tall, the lights should be roughly 75 to 100 meters apart. This gives you good coverage without wasting fixtures or blasting extra light in one spot.
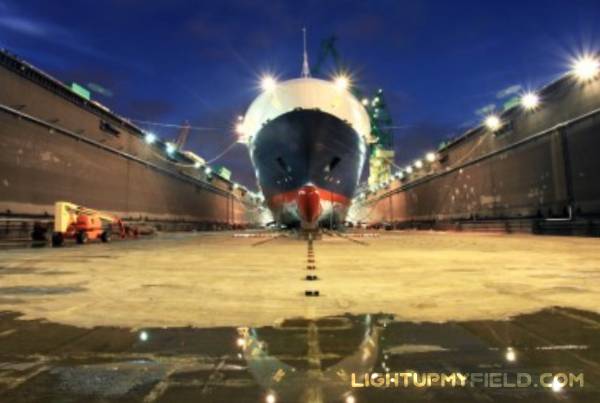
For instance, if you have a 180-meter-long dock with poles mounted at 30 meters, your ideal spacing is about 90 to 120 meters apart along the length. That usually works out to two high-mast poles on each side of the dock, or maybe three if you want more uniformity. Remember, those extra poles might feel like an added cost upfront, but they save you from having to deal with uneven lighting that slows down work and creates safety hazards.
Beam Angles and Why They Matter
 It’s not just about height and spacing; the beam angle of your floodlight plays a big role too. A narrow beam—think 30° to 45°—throws a focused, powerful beam on a small area. Great for spot lighting or highlighting a specific task area, but if you use those for general dock lighting, you’ll need a lot of fixtures close together, which isn’t efficient.
A wider beam angle, like 60° to 120°, covers a much larger area. That sounds great, but the trade-off is intensity. The wider the beam, the lower the light level at ground level unless the fixture is really powerful. For dry docks, most floodlights fall into the 60° to 90° range, which is a sweet spot for broad coverage without losing too much brightness.
To put this in perspective, if you use a 60° beam on a 30-meter pole, you can cover around 60 to 70 meters of width effectively. A 90° beam can cover more, but if your dock work needs 150 lux for heavy assembly tasks, make sure your fixture’s lumen output can handle it. For example, a 600W LED floodlight producing around 90,000 lumens can easily manage that at 30 meters with a 60° beam.
The Example That Ties It All Together
Let’s go back to our 180-meter-long, 50-meter-wide dry dock. If you’ve got 30-meter poles and use the 3-4x rule, spacing them 90 to 120 meters apart works well along the length. Two poles per side might sound minimal, but combined with the right beam angles and fixture wattage, that setup can deliver a uniformity ratio close to 1:1.5, which is what you should aim for. For extra smooth lighting, adding a third pole per side can bring that ratio closer to 1:1.3, which workers will appreciate during precision tasks like welding and inspections.
Uniformity Is Non-Negotiable
Even if you follow all the spacing guidelines, the key is uniformity. You want the difference between the brightest and dimmest areas to be small—ideally a ratio of 1:1.5 or better. Why does that matter? Because when workers constantly shift from a bright zone to a dim one, their eyes need to adjust. That might not sound like a big deal, but over a 10-hour shift, it’s exhausting and can lead to mistakes. In lighting terms, anything worse than 1:2 starts feeling like a problem for visibility.
Obstacles Make Things Tricky
On paper, spacing seems straightforward, but in reality, dry docks aren’t wide-open parking lots. They’re full of cranes, scaffolding, hull structures, and massive steel components. These obstacles can block light and cast big shadows, even if your theoretical spacing is perfect. That’s why most shipyards end up supplementing high-mast lighting with lower-mounted floodlights along walkways, ladders, or inside hull sections. Sometimes, even a few portable LED lights can make a world of difference in tight spots where permanent fixtures can’t reach.
And here’s a detail people often overlook: reflections from water and steel surfaces can either help or hurt your lighting plan. A shiny steel plate might bounce light around and brighten a shadowy area—but it can also create glare if your fixtures are aimed poorly. That’s why aiming angles and shield designs matter just as much as spacing.
How to Measure the Spacing Between Lights
 Figuring out the best spacing between floodlights isn’t just a math problem—it’s a mix of planning, real-world checks, and a bit of flexibility. Even if you start with textbook calculations, the layout needs to work on the ground, not just on paper.
Start with a Solid Layout Plan
The first step is always planning. Take a scaled drawing of the dry dock and plot your high-mast poles based on the 3–4x mounting height rule. So, for example, if your poles are 30 meters tall, begin with positions that are about 90 to 120 meters apart. From there, make adjustments for real-world challenges like crane tracks, scaffolding zones, access roads, and electrical connection points.
A common starting approach is to place poles at the four corners of the dock, then fill in along the sides until coverage looks balanced. Don’t forget that dry docks often have structures sticking up or equipment moving around, so you might need to tweak the alignment to avoid shadows later.
Check Coverage with Lux Measurements
Once the lights are up, you can’t just eyeball it and call it good. Use a digital lux meter to get actual readings across the work zone. Take measurements at multiple points—not just in the middle, but also along walkways, near machinery, and in those tricky areas where shadows might form.
For reference, general working areas in a dry dock typically target 100 to 200 lux, while inspection zones need around 500 lux or more. If you notice certain spots dropping well below those numbers—say, a dip down to 70 lux between two poles—you probably need to tighten up your spacing or add supplemental lighting.
Here’s an example: If your design calls for 150 lux and you’re getting 120 lux in several midpoints between lights, that’s a 20% shortfall. That might seem small, but for detailed tasks like welding or surface prep, it can slow down work and lead to mistakes.
Run a Simulation Before You Drill Holes
Before any poles go in the ground, it’s smart to simulate the lighting layout using photometric software. Tools like Dialux, AGi32, or even manufacturer-provided calculators can model the light distribution for different mounting heights, beam angles, and fixture wattages. This helps you spot potential dark zones or over-lit areas before any real-world installation happens.
Think of it like a test drive before buying a car—you don’t want to commit without knowing it performs as expected. A well-done simulation can also confirm whether two poles per side are enough or if you need that third one to maintain a good uniformity ratio, ideally around 1:1.5.
Plan for Maintenance and Growth
Lighting isn’t a “set it and forget it” situation. Over time, fixtures lose output because of dust, corrosion, and aging LEDs. That’s why designers use a maintenance factor of 0.7 to 0.8, which means your initial design should overshoot the target by about 20–30%. If you need 150 lux long-term, aim for 180 lux when new to keep performance within spec for years.
Also, think about the future. If your dock might expand or add new heavy machinery, leave room for extra poles or mounting points. Upgrading later is way easier if you’ve already planned the infrastructure.
Bringing It All Together
Floodlight spacing in dry docks isn’t guesswork—it’s a mix of physics, safety, and smart planning. Stick to the rule of 3 to 4 times the mounting height, keep an eye on beam angles, and check uniformity across the space. Use photometric simulations where possible, and don’t skip real-world measurements after installation. When the layout is right, you’ll notice fewer shadows, less glare, and a smoother workflow for everyone on site.