Lighting a hangar sounds simple at first glance—just install bright fixtures and you’re good to go, right? But once you start digging into the details, you realize spacing between lights is a huge deal. Get it wrong and you’ll end up with annoying dark patches, harsh glare, or uneven brightness that makes maintenance work a headache. Get it right and you’ll have a well-lit, energy-efficient hangar where technicians can do their job comfortably and safely. So how do you figure out the ideal spacing? Let’s break it down.
Why We Need to Consider the Spacing Between Hangar Lights
Hangars Are Massive Spaces, Not Just Big Rooms
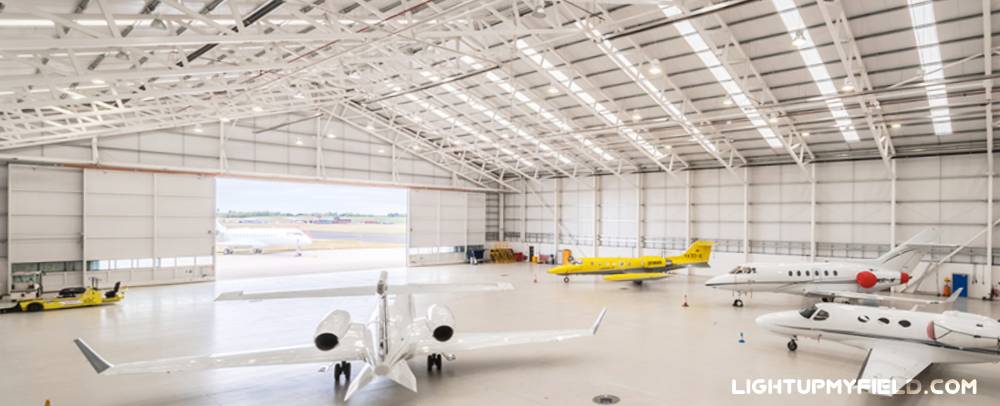
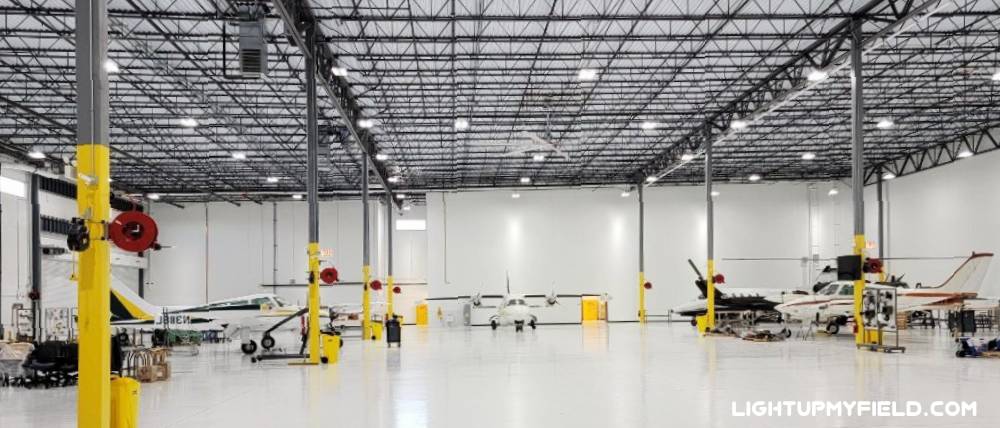
A hangar isn’t like your living room or even a typical warehouse. These spaces are huge—some stretch well over 100,000 square feet, and the ceilings can soar anywhere from 40 to 60 feet high. With that kind of scale, lighting becomes a lot more than just “hang a few lights and call it a day.” If you don’t plan the spacing carefully, you’re going to end up with patchy light coverage—bright circles right under each fixture and shadowy dead zones in between. That unevenness can be a real headache for anyone trying to do precision work on an aircraft.

Why Uneven Lighting Slows Everything Down
Think about what’s happening inside a hangar. Crews are inspecting surfaces, looking for small dents, cracks, or signs of corrosion. Under poor lighting, a hairline crack that could compromise safety might go unnoticed. If the center of the floor is bright, but the wings or tail section are in dimmer zones, mechanics have to drag extra lights around or reposition the plane just to see properly. That eats into maintenance schedules, and time is money in aviation.
Light Doesn’t Fall Straight Down
Here’s the thing—light doesn’t just beam straight down like a flashlight. It spreads out in a cone-shaped pattern, and the farther it travels, the weaker it gets. When fixtures are spaced too close together, you’re wasting energy because their beams overlap too much, and glare becomes a problem. On the flip side, if the spacing is too wide, you’ll have bright islands of light separated by dark seas, and that’s the last thing you want in a safety-focused environment.
To put numbers to this: if your fixtures are mounted at 50 feet, and you place them 80 feet apart, you’ll likely end up with lux levels dropping from 500 lux under the light to less than 200 lux halfway between fixtures. That’s a huge difference, considering FAA guidelines for maintenance areas call for around 500 lux.
Why Shadows Are a Bigger Problem Than You Think
Shadows aren’t just annoying—they can hide potential hazards. Imagine checking hydraulic lines or engine components under uneven light. A shadow from a poorly spaced fixture could make a leak or crack invisible until it becomes a much bigger issue. That’s why uniform lighting across the hangar floor matters so much. The goal is to keep the difference between the brightest and darkest spots minimal, which means spacing has to be planned based on mounting height, beam angle, and light output.
How to Determine the Ideal Spacing
Is There a Magic Number?
Honestly, there’s no single perfect spacing that works for every hangar, because every space is different—different ceiling heights, different aircraft sizes, and different maintenance requirements. But there is a formula that designers love to use: the Spacing-to-Mounting Height Ratio (SMHR). It sounds technical, but it’s actually pretty straightforward.
What Is SMHR and How Does It Work?
The SMHR compares how far apart your lights are to how high they’re mounted. For most high-bay LED fixtures commonly used in hangars, the sweet spot for this ratio is between 0.8 and 1.2. So, let’s break that down in real terms:
If your fixtures are installed 50 feet up, your spacing should land somewhere between 40 feet (50 × 0.8) and 60 feet (50 × 1.2). Stay in that range and you’ll usually get a nice, even spread of light. Go beyond that—say 70 or 80 feet apart—and you’re almost guaranteed to see big drops in light levels between fixtures, which can create visibility issues.
Why Does This Matter for Lux Levels?
Lighting isn’t just about “bright” versus “dim”—it’s about hitting the right lux target. For FAA and ICAO standards, maintenance zones are expected to hit about 500 lux (roughly 46 foot-candles). That’s way brighter than your average office, which usually sits around 300 lux. For general walkways or storage areas, 200–300 lux is the norm.
Spacing plays a huge role here. If your lights are spaced too far apart, you might start with 500 lux right under the fixture but then drop down to 150 lux just a few feet away. That unevenness can fail compliance checks and make work harder for your crew.
Don’t Forget About Beam Angle
Another big piece of the puzzle is beam angle—basically, how wide the light spreads out from the fixture. A fixture with a wide beam, like 90°, throws light over a larger area, so you can afford to space them farther apart without creating dark gaps. On the flip side, a narrow beam (60° or less) is great for spotlighting specific areas, but if you use those across an entire hangar, you’ll need to install them closer together—sometimes as close as 30–40 feet apart—to avoid uneven coverage.
To give you an idea, a 60° beam from a fixture mounted at 50 feet might only light up a circle about 60–70 feet across, while a 90° beam at the same height could cover close to 100 feet in diameter. That difference alone can save or cost you dozens of fixtures depending on the design.
Factors Affecting the Spacing
Ceiling Height and Mounting Position
Ceiling height is one of the first things you need to look at because it directly changes how far your light can travel and spread. The basic idea is simple: the higher the fixture, the wider its light footprint—up to a point. For example, a hangar with a 60-foot ceiling will typically allow a spacing of 50 to 70 feet, while a hangar with a 30-foot ceiling might need lights closer together, say 25 to 35 feet apart, to maintain the same illumination levels on the floor.
But it’s not just about throwing lights up high and calling it a day. The higher the mounting height, the more light intensity you lose by the time it hits the floor because of the inverse square law (basically, light intensity drops as distance increases). So if you space them too far apart in a tall hangar, you’ll start seeing “hot spots” under each light and darker patches in between, which really messes with uniformity.
Fixture Type and Output
Not all lights are created equal. Modern high-bay LED fixtures have completely changed the game compared to older metal halide or fluorescent lights. A single LED high-bay can push out anywhere from 30,000 to 60,000 lumens, and some premium models go beyond that. Compare that to an old-school metal halide lamp that barely hit 20,000 lumens at best—and lost a ton of output as it aged.
Now, you might think, “Well, more lumens means I can just space them farther apart, right?” Not exactly. While higher output helps, beam angle and light distribution are just as important. If you have a 60,000-lumen fixture with a narrow 60° beam, you still can’t spread them as far apart as a 40,000-lumen fixture with a wide 90° beam, because the narrower beam creates a smaller light footprint on the floor.
Task Zones and Light Requirements
Here’s something a lot of people miss: not every square foot of a hangar needs the same brightness. Maintenance areas where technicians are checking wiring, hydraulics, or small cracks in metal need around 500 lux (about 46 foot-candles), based on FAA and ICAO standards. To hit that level, you need tighter fixture spacing, especially if the lights are mounted high.
On the other hand, storage zones or simple taxi-through areas can get by with 200 to 300 lux (roughly 18–28 fc). That means wider spacing and possibly fewer fixtures in those zones. Some hangars even mix fixture types—high-output LEDs over the aircraft maintenance bays and slightly lower-output units for peripheral areas.
Reflective Surfaces and Paint Colors
This one surprises people, but the color of your walls and floors actually changes your lighting performance. Light-colored or glossy surfaces bounce light around, which makes the whole space feel brighter and lets you increase spacing by a few extra feet without dropping below your lux target.
Dark matte surfaces? They do the opposite—they suck up light like a sponge. If your hangar floor is a dark epoxy or the walls are painted gray, expect to close that spacing back up or bump up your fixture count to compensate. Studies show reflectivity can swing effective brightness by 10–20%, which isn’t small when you’re talking about a six-figure lighting project.
Glare Control and Comfort
Packing a bunch of high-powered fixtures too close together creates another headache: glare. And glare isn’t just uncomfortable—it can lead to eye strain and slower work over long shifts. That’s why spacing decisions often go hand-in-hand with diffusers, baffles, or adjusting beam angles to soften the light output without sacrificing brightness.
Some designers even incorporate indirect lighting or secondary reflectors in certain zones to reduce glare on shiny aircraft surfaces. Think about it: you’ve got a massive aluminum fuselage acting like a mirror—poorly planned lighting can turn that into a blinding hazard.
Points to Note When Having Hangar Lighting Design
Think Beyond Lux Levels
It’s easy to get hung up on hitting 500 lux in maintenance areas or 200–300 lux in storage zones and forget the bigger picture. Lighting isn’t just about brightness—it’s about how well the system works over time. For example, LEDs are a fantastic choice because they typically last 50,000 to 100,000 hours, which can mean over 10 years of service life if you’re running them 12 hours a day. But that doesn’t mean zero maintenance. Fixtures will still need cleaning, occasional driver replacements, and access for servicing, especially in a hangar where lights are often mounted 40 to 60 feet above the floor.
That’s why proper spacing should also allow for safe access with lifts or catwalks. Nothing kills your maintenance schedule faster than realizing you need a special crane just to reach a light because they were packed too tightly or installed in hard-to-reach spots.
Add Smart Controls Into the Mix
Hangar lighting design isn’t just about where the fixtures go—it’s also about how you control them. With a space as large as a hangar, you don’t want to be running every single light at full brightness all day long. Incorporating dimming features and zone-based controls can make a huge difference.
For example, during non-peak hours, or when certain bays aren’t in use, lights in those areas can dim down or turn off entirely. Some modern control systems even tie into occupancy sensors and daylight harvesting. When you combine good spacing with smart controls, energy savings can hit 30–40% over time, which adds up to tens of thousands of dollars per year in a large hangar.
Don’t Skip Lighting Simulations
One of the smartest steps in hangar lighting design is running a professional lighting simulation before anything gets installed. Software like Dialux or AGi32 can model your exact hangar dimensions, fixture specifications, and mounting height. You’ll see whether your proposed spacing gives you the uniformity ratio you need (usually 3:1 or better) and if your maintenance zones actually hit that 500 lux target.
Think about it: a simulation costs a few hundred bucks or a few hours of design time, while re-hanging dozens of fixtures on a 100-foot ceiling can cost thousands and delay your project by weeks. Simulations help you catch problems like dark spots, excessive glare, or wasted energy before you buy a single fixture.
So, What’s the Sweet Spot?
The ideal spacing between hangar lights depends on your ceiling height, fixture type, and light level requirements, but as a starting point, using an SMHR of 0.8 to 1.2 works for most designs. For a 50-foot mounting height, you’re looking at somewhere between 40 and 60 feet between fixtures—closer for narrow beam lights or high-detail work, farther for general zones with wide-beam fixtures.
Getting the spacing right isn’t just about meeting codes—it affects how fast crews can work, how safe the environment is, and how much you’ll spend on energy every single year. A well-planned layout can save thousands in operational costs and keep your team working efficiently without battling shadows or glare.