Ever tried hitting balls at a driving range at night only to find yourself squinting or missing targets completely? Poor lighting can turn a fun practice session into a frustrating experience, not just for golfers but also for staff and visitors. Getting lighting right isn’t just about being able to see—it also makes the range safer, more enjoyable, and can even save a lot on energy costs over time. Let’s explore how driving range lighting can be designed and laid out effectively, in ways that look good, feel comfortable, and work well for any setup.
Lighting Design Principles
Finding the Right Balance
Lighting a driving range isn’t just about cranking up the brightness. There’s a real sweet spot between too dim and too glaring. If the lights are too low, players can struggle to track balls, especially on the farthest targets, which can be anywhere from 150 to 300 yards out. On the flip side, if the lights are too bright or poorly aimed, the glare can make it uncomfortable to play and even cause mistakes during practice. A smart lighting layout focuses on even coverage across every hitting bay, tee box, and target green, so players don’t get stuck in shadows or face hot spots of blinding light.
Uniformity is a key term here. In lighting design, it refers to how evenly light spreads across the range. Ideally, the uniformity ratio on the hitting bays should be around 0.6 to 0.8. This means the dimmest spot isn’t less than 60–80% as bright as the brightest area. Achieving this requires careful spacing of fixtures, correct beam angles, and sometimes overlapping the light cones from multiple poles or high bays. Without it, balls in certain areas might seem almost invisible under artificial light, which is frustrating for players and can slow down practice sessions.
Glare and Color Temperature
Glare is one of those sneaky things that people often forget about when planning range lighting. Even a single misaligned floodlight can bounce off synthetic turf, mats, or nearby structures, creating distracting reflections or blinding spots. To tackle this, most designers aim lights slightly downward and use fixtures with cut-off shields to control spill light. It’s amazing how a tiny 5–10 degree tilt adjustment can change visibility dramatically.
Color temperature also plays a big role. Most outdoor ranges use LEDs in the 4000K–5000K range, which is close to natural daylight. This temperature is bright enough to help players see the ball clearly, track its flight, and identify markers at 100, 150, or even 200 yards, but soft enough to reduce eye fatigue during long evening sessions. A high Color Rendering Index (CRI) above 70 is ideal because it helps players see colors accurately, which matters for targeting flags, markers, and ball visibility.
Safety and Pathway Lighting
Good lighting isn’t just about hitting balls—it’s about keeping everyone safe. Walkways, parking lots, and common areas should be lit to around 20–50 lux, enough to prevent trips and accidents without over-lighting. Well-placed bollard lights, pole-mounted luminaires, and down-facing pathway lights help create a safe environment for everyone walking between bays or heading to the parking area at night.
Even in smaller or shorter ranges, where the farthest target might only be 100 yards away, safety lighting is necessary for approach areas, staff walkways, and loading zones. Bright hitting bays are great, but without proper peripheral lighting, players can easily misstep or bump into obstacles when moving around the range.
Energy Efficiency and Smart Controls
A well-designed driving range lighting system also needs to make sense financially. Using LED fixtures instead of older metal halide or high-pressure sodium lights can cut energy use by 50–70% while providing brighter, more consistent light. LEDs also last longer—often 50,000 hours or more—so you won’t be climbing poles to replace bulbs every season.
Smart controls, like motion sensors, dimmers, and timers, can make a huge difference. For instance, if your range operates until 10 PM but sees fewer visitors after 8 PM, dimming lights in unused areas or automatically turning off some zones can save hundreds of dollars in electricity each month. Some high-tech ranges even use networked lighting systems that let operators adjust zones remotely and monitor energy usage in real time, ensuring the right areas are lit when needed without wasting power.
Getting the Layout Right
Finally, good design is about planning before installation. Knowing your range layout, including the number of bays, distance to targets, and nearby structures, helps determine pole spacing, fixture types, and aiming angles. Outdoor ranges often space poles 25–30 feet apart and mount lights 20–25 feet high, aiming slightly downward to cover 60–80 feet of width per light cone. Indoor ranges with high bays might use reflective panels or angled fixtures to maximize spread and reduce shadows across artificial turf lanes. Small adjustments—like moving a pole 2–3 feet or tilting a light a few degrees—can make a noticeable difference in coverage.
Site Assessment and Planning
Understanding Your Range Layout
Before you even start picking lights, it’s worth taking a good look at your range. How many hitting bays do you actually have? Outdoor ranges can range from 10–50 bays, sometimes more for commercial setups. How far are your farthest targets? On larger facilities, balls can travel 200–300 yards, while smaller ranges might max out at 100–150 yards. Knowing these distances helps determine the power and spread of lights you’ll need so balls are visible all the way out.
You’ll also want to consider obstacles. Trees, nearby buildings, fences, or even hills can block or reflect light in ways that create shadows or blind spots. Mapping out the layout—both horizontally and vertically—helps decide pole placement, mounting height, and beam angles. Some designers even use basic CAD or 3D modeling to visualize where light will hit and identify problem spots before any poles go in the ground.
Environmental and Regulatory Considerations
Cities and municipalities often have rules about light pollution, especially if your range is near residential areas. Simply blasting the sky with floodlights can lead to complaints or even fines. Most local regulations will specify maximum candela per fixture, allowable spill angles, or light trespass limits. Some areas may also require that outdoor lighting doesn’t exceed certain lux levels beyond the property line.
Weather is another factor that’s easy to overlook. Fog, mist, rain, and even snow can scatter light, reducing effective illumination and creating glare. Fixtures with IP65 or higher ratings for water and dust resistance are generally preferred for exposed ranges, and angled or shielded lights can help reduce scatter on foggy nights. For indoor ranges, proper ventilation and humidity control will also affect fixture choice, as high humidity can reduce LED lifespan or create condensation on lenses.
Knowing Your Audience
Not all ranges are created equal, and the type of player you cater to affects your lighting plan. Beginners often need softer, more even light, so they can track balls without feeling dazzled. Advanced players, especially those working on ball flight or distance control, prefer crisper lighting with higher contrast, so they can see spin, trajectory, and where balls land against targets.
Even the timing of your peak hours matters. If your range is busiest after sunset, the lighting design must support full coverage in all lanes and target areas. For daytime-focused ranges, you may only need supplemental lighting for shaded bays or evening events. Some facilities even use adjustable zones, allowing dimming or brightening of certain sections depending on the number of players or time of day, which also saves on energy costs.
Lighting Requirements
How Much Light Is Enough?
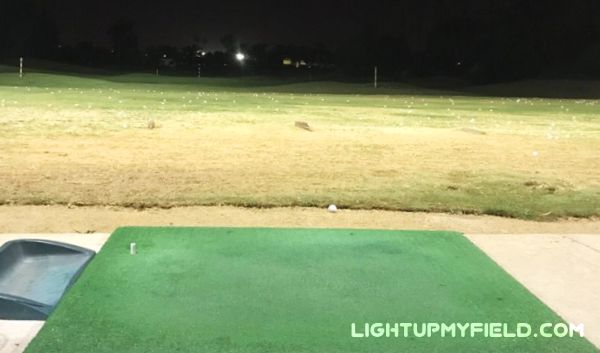 One of the first questions every driving range owner asks is, “How bright should the range actually be?” For outdoor hitting bays, 150–200 lux is usually a good starting point. This level lets players track balls comfortably, even at distances of 150–250 yards, without causing eye strain. Targets and greens, especially those at the far end of the range, often need slightly more illumination—around 200–250 lux—to make balls easier to see against grass, turf, or markers.
It’s not just about raw brightness, though. Uniformity matters just as much. Imagine practicing in a bay where one side is bright and the other looks like dusk—that’s frustrating and can even affect performance. A uniformity ratio of 0.6–0.8 ensures the dimmest spots aren’t more than 40% darker than the brightest areas, keeping shadows minimal and visibility consistent across all bays. Overlapping beam angles from multiple poles or high bays can help achieve this, creating a smooth, even spread of light across hitting areas.
Color Temperature and Ball Visibility
Color temperature affects how natural the range looks and how easily players can spot the ball. Most outdoor ranges stick to 4000K–5000K LEDs, which give a daylight-like feel that makes it easier to distinguish balls, markers, and turf patterns. Lower temperatures can feel yellowish and dull, while higher temperatures can seem harsh and glaring.
The Color Rendering Index (CRI) is another piece of the puzzle. A CRI above 70 is recommended because it makes colors appear closer to how the human eye sees them naturally. This is especially helpful when balls, flags, or markers have similar tones to the turf. If CRI is too low, the ball can blend into the background, making tracking more difficult and reducing the effectiveness of nighttime practice.
Beam Spread and Coverage
Beyond lux and color, beam angles play a role in ensuring the light hits the right spots. Floodlights with wide angles cover more surface area but can spill light into unwanted zones, while narrower beams give concentrated light to far targets. Many ranges use a mix of beam types—wider angles for hitting bays and narrower, focused beams for distant target greens—to balance coverage and efficiency.
Spacing and mounting height also tie into this. Outdoor ranges typically mount lights 20–25 feet high with spacing around 25–30 feet apart, which usually covers a 60–80 foot-wide swath of the field per fixture. For indoor high-bay setups, reflective back panels can help spread light evenly across lanes without adding more fixtures, improving visibility and keeping energy use low.
Fixture Selection
Picking the Right Type
When it comes to driving range lighting, the fixture choice can really make or break the whole setup. For outdoor ranges, pole-mounted LED floodlights are the go-to option. They’re sturdy, offer wide coverage, and can be aimed precisely to hit every bay and target area. Indoor ranges, on the other hand, often rely on high-bay LEDs or wall-mounted spotlights to brighten lanes evenly without creating hot spots or shadows.
The type of fixture affects more than just brightness. Beam angle and lumen output are crucial for determining how far and wide the light spreads. A narrow beam concentrates light but only covers a small patch, while a wide beam can illuminate larger areas but risks spilling light onto areas you don’t want lit. Many ranges use a mix—wide floodlights for hitting bays and narrower, focused fixtures for distant targets—to get that perfect balance of coverage and efficiency.
Height and Placement
Mounting height is another factor that often gets overlooked. Outdoor poles usually work best at 20–30 feet tall, depending on the width of your range and how far your targets are. Too low, and the light creates harsh shadows and glare; too high, and intensity drops off at the farthest targets. For indoor setups, ceiling height and fixture spacing are equally important—high bays often go up 15–25 feet to cover long lanes without over-lighting the near areas.
Orientation also matters. Tilting fixtures slightly downward reduces light spillage, protects neighboring properties from unwanted illumination, and improves efficiency because more light hits the ground where it’s needed. Some ranges also use adjustable mounts, allowing small tweaks after installation to fine-tune coverage and reduce shadows or glare in key zones.
Weatherproofing and Durability
Outdoor ranges face the elements, so fixture durability is a must. Look for lights with a high IP rating, typically IP65 or higher, which ensures they can handle rain, snow, dust, and even wind without failing. LEDs are naturally more durable than traditional bulbs, often rated for 50,000 hours or more, so the upfront investment pays off with fewer replacements and lower maintenance costs.
Materials and build quality are worth noting too. Powder-coated poles resist rust, and impact-resistant lenses protect LEDs from errant golf balls or debris. Even small choices in fixture design can extend the life of your lighting system and keep it performing at peak levels for years.
Lighting Layout Design
Planning Pole Placement
Once you’ve picked your fixtures, the next step is figuring out exactly where they should go. Outdoor hitting bays usually benefit from poles evenly spaced on either side, creating a consistent wash of light across every lane. For most ranges, poles are spaced around 25–30 feet apart and mounted 20–30 feet high, which covers each bay’s width—often 12–15 feet per hitting station—without leaving dark spots. Getting this spacing right is huge because uneven lighting can make balls disappear mid-flight or create confusing shadows on mats and turf.
Angles and aiming points are just as important. Lights should be tilted slightly downward, usually 5–10 degrees, to hit the hitting bays and the first 100–150 yards of the field without blinding players. Overlapping light cones from multiple fixtures helps smooth out hot spots and dark areas, creating that uniform illumination that makes night practice comfortable and accurate.
Highlighting Targets and Distance Markers
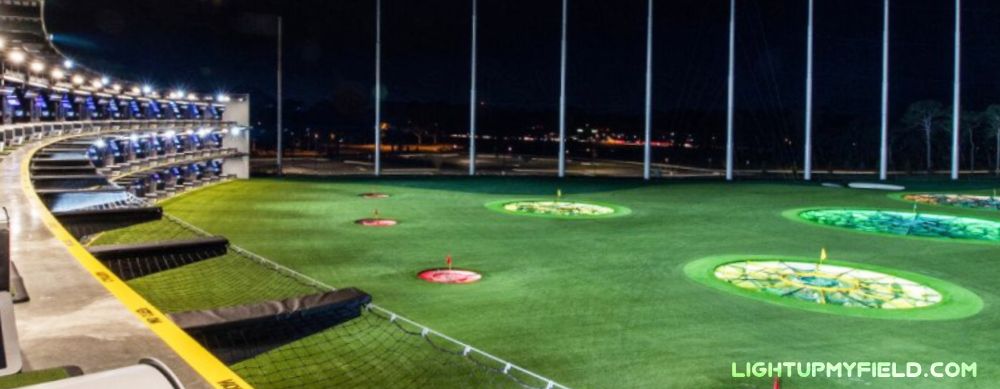
Far targets and distance markers need their own attention. Even a perfectly lit bay won’t help if the 200-yard target is lost in the dark. Focused spotlights or accent lights can make flags, markers, and greens pop, helping players track balls accurately over long distances. Some ranges even use low-angle LED uplights or colored lighting around target greens during evening tournaments or events, which adds visual appeal while improving aiming precision.
Illuminating Surrounding Areas
Hitting bays aren’t the only spaces that need lighting. Walkways, parking lots, and common areas require about 20–50 lux for safety, enough to prevent trips or collisions without wasting energy. Well-placed bollard lights, pole-mounted fixtures, or downward-facing LEDs can guide people safely between areas while keeping the overall look polished and professional. Safety lighting also helps staff manage operations efficiently during nighttime hours.
Using Simulation for Precision
Modern driving ranges often rely on lighting simulation software to plan layouts. These programs let designers visualize beam angles, coverage areas, and intensity before installation, which can save a lot of trial-and-error in the field. With simulation, it’s easy to tweak pole heights by a few feet, adjust tilt angles slightly, or change fixture spacing to hit that perfect balance of brightness, uniformity, and efficiency. Some high-end software even shows how light interacts with different surfaces—like turf, mats, and netting—so you can anticipate glare and shadows in advance.
Balancing Efficiency and Performance
A well-planned layout isn’t just about making things bright—it’s about using fewer fixtures more effectively. Over-lighting wastes energy, while under-lighting frustrates players. By combining pole spacing, beam overlap, target accent lights, and peripheral lighting for safety, you get a driving range that’s well-lit, energy-efficient, and visually appealing. Even small adjustments—like shifting one pole a few feet or changing a fixture’s tilt by 5 degrees—can make a noticeable difference in coverage and uniformity.
Installation Guidelines
Getting Fixtures Up Safely
Installing driving range lights is more than just bolting them to poles and turning them on. The poles and fixtures need to be secure, level, and properly anchored, especially for outdoor ranges that face wind, rain, or occasional storms. Most outdoor poles are set in concrete bases at least 3–4 feet deep, which keeps them stable over time. Indoor high-bay fixtures need sturdy ceiling mounts capable of supporting both weight and vibration from nearby machinery or air circulation systems.
Electrical wiring is another major factor. Following local electrical codes isn’t just a formality—it prevents flickering, short circuits, and fire hazards. Coordinating with licensed electricians ensures that circuits, breakers, and conduit systems can handle the total wattage, especially on larger ranges where total lighting power can exceed 10–15 kW.
Fine-Tuning for Perfect Coverage
Once the lights are installed, small adjustments can have a big impact. Tilting fixtures a few degrees, repositioning reflectors, or slightly rotating pole-mounted floodlights can smooth out uneven spots and reduce glare on hitting mats and target greens. Some facilities also install adjustable mounts or brackets, which let staff fine-tune lighting angles seasonally or if the range layout changes.
Even minor tweaks—like lowering a pole by 1–2 feet or rotating a fixture 5 degrees—can eliminate shadows at the farthest targets, improve ball visibility, and make hitting lanes feel consistently bright from end to end. These small details often separate a “good” range from a “great” one at night.
Coordinating With Contractors
If the installation involves multiple fixtures or complex wiring, working with experienced contractors is key. They can sequence pole installation, manage lifts for tall poles, and ensure all fixtures are aligned correctly. Mistakes during installation can cause uneven light, damaged LEDs, or unnecessary maintenance costs down the road. Investing time and expertise upfront saves both headaches and money later.
Compliance and Standards
Local Rules and Regulations
Almost every city or region has rules about outdoor lighting, particularly regarding light pollution, brightness limits, and fixture placement. Some areas enforce specific cutoff angles or maximum lux levels at property lines to prevent light from spilling into neighbors’ homes. Failing to comply can lead to complaints, fines, or even forced redesigns of your lighting system.
Many facilities also reference IES (Illuminating Engineering Society) standards, which provide guidance for sports lighting. These guidelines cover recommended lux levels, uniformity ratios, beam angles, and fixture types, helping designers and operators create safe and effective lighting that meets recognized industry standards.
Environmental Considerations
Good lighting design doesn’t just help players—it also respects the environment. Directional lighting, shields, and focused beams reduce unnecessary light spill, minimizing impact on nearby wildlife and reducing energy waste. For example, keeping stray light off nearby trees can protect birds and nocturnal animals, while using adjustable cut-off shields ensures light only hits the hitting bays and target areas.
Case Studies and Examples
Outdoor Range Success
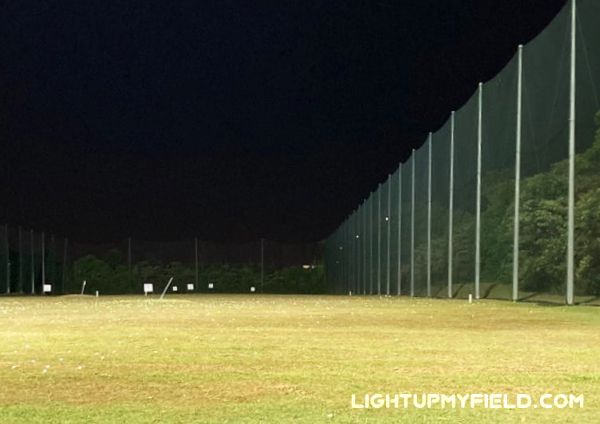
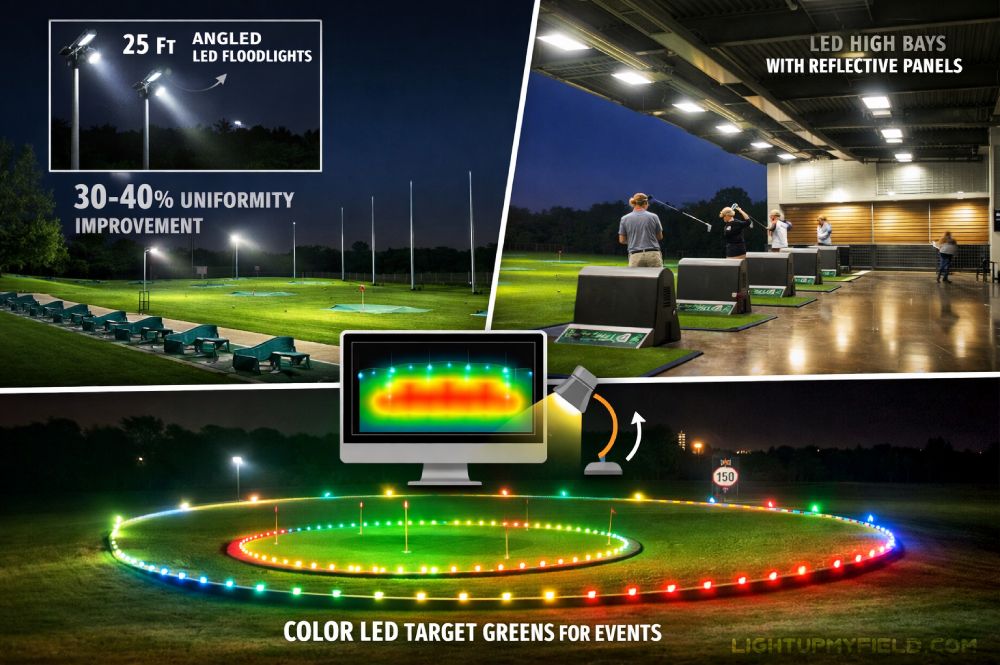
Some driving ranges have really set the bar when it comes to lighting. One outdoor facility added angled pole-mounted LEDs at 25 feet, slightly tilted downward, to cover every hitting bay evenly. The result? They saw a 30–40% improvement in uniformity across all lanes. Shadows that once appeared at the edges of bays practically disappeared, making it easier for players to track balls from tee to target. This kind of improvement doesn’t just make the range more playable at night—it also feels more professional and welcoming to visitors.
Another clever trick some ranges use is combining wide floodlights for hitting bays with narrower spotlights for distant targets. This mix ensures the entire field is illuminated while keeping energy use in check. Some facilities even fine-tune individual poles after installation, adjusting angles by just 5–10 degrees or moving a fixture 2–3 feet to eliminate lingering dark spots.
Indoor Range Examples
Indoor driving ranges have their own challenges. One facility installed low-energy LED high bays with reflective back panels behind each lane. By doing this, every hitting lane became brighter and more evenly lit without increasing energy consumption. Reflective panels bounce light back onto the floor and hitting mats, filling in shadows that traditional high bays often leave. This method is particularly effective for ranges with artificial turf or mats, where ball visibility can be affected by shadows and low contrast.
Lessons Learned
Across both indoor and outdoor examples, a few themes stand out. Simulation before installation is invaluable—it helps designers visualize light spread, identify problem areas, and tweak beam angles before any poles go in the ground. Adjustable fixtures also make life easier, letting operators fine-tune lighting as seasons, weather, or range layouts change. Even small tweaks, like moving a single pole a few feet, can dramatically improve visibility at far targets.
Another takeaway is that lighting can do more than just illuminate—it can enhance the experience. Some ranges have embraced colored LED accent lighting around target greens for evening tournaments or events. This isn’t just cosmetic; it helps players focus on targets while also giving the facility a unique, modern vibe that keeps customers coming back. Well-executed lighting can make the difference between a run-of-the-mill range and one that feels professional and fun to visit at night.
Turning Lighting Into a Feature
The key lesson is that lighting should be functional, flexible, and visually appealing. Good design improves performance, enhances safety, and elevates the overall atmosphere. Ranges that treat lighting as an integral part of the experience—not just a necessity—tend to stand out in the market. With thoughtful fixture placement, adjustable angles, and a mix of beam spreads, you can achieve uniform coverage, energy efficiency, and a visually engaging environment.
Bringing Light to the Range
The right lighting can transform a driving range. Players hit more confidently, staff operate safely, and the facility looks more professional. Smart planning, proper fixture selection, and careful layout design all contribute to a smoother experience. Even small details, like aiming angles or the color temperature of lights, can have a noticeable effect on enjoyment and visibility.
For anyone looking to upgrade or build a driving range, it’s worth getting professional input. Lighting design involves more than picking a few bright bulbs—it’s about understanding coverage, angles, safety, and efficiency. If you want a setup that looks great, works well, and keeps costs manageable, reaching out for consultation can save both time and money while making sure the range stands out at night.