Installing lights for a softball field might seem straightforward—you buy some poles, mount the lights, and flip the switch. But anyone who’s worked with sports lighting knows it’s far trickier than it looks. Poorly planned lighting can cause glare, uneven coverage, high energy bills, or even safety issues. Knowing what to avoid can save time, money, and headaches later.
1. Not Planning for Uniform Lighting
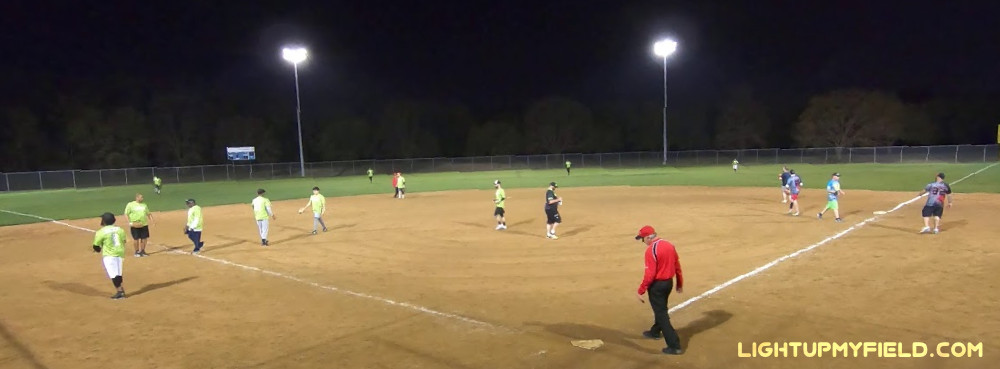
One of the biggest mistakes when installing softball field lights is ignoring uniformity. A lot of people assume that simply installing high-wattage fixtures guarantees good visibility, but that’s not how it works. Uneven lighting can create dark zones along foul lines, infield corners, or behind the pitcher’s mound. These shadowy areas make it difficult for players to track fast-moving balls, especially during pop-ups or line drives.
For example, a 200-foot recreational field might technically reach 250 lux at the center with four LED poles, but if the lights aren’t properly spaced, the edges could drop below 150 lux, while some infield areas could spike over 400 lux, creating glaring contrasts. This not only impacts player performance but can also cause eye strain and visual fatigue over time.
Maintaining even coverage involves proper pole placement, beam overlap, and fixture selection. Designers often aim for a uniformity ratio of 0.6 or higher, meaning the dimmest area should be at least 60% as bright as the average lux across the field. For competitive fields, professional or tournament-level setups often target ratios of 0.7–0.8, ensuring every infield and outfield zone is evenly lit. Proper planning like this avoids hotspots, reduces glare, and ensures players and umpires can see the action consistently.
Adding too many lights randomly doesn’t fix the problem either—it can actually make it worse. Overlapping beams incorrectly or positioning lights too close together can create blinding hotspots that make it harder to judge the ball’s trajectory, especially for batters or outfielders tracking fly balls.
2. Choosing the Wrong Pole Height
Pole height is another area where mistakes often happen. The height of the poles directly affects both the spread of light and the intensity of illumination. Poles that are too short, say below 40 feet on a regulation field, often create harsh shadows under the bases and infield corners, which can interfere with fielding and pitching. Players might see bright infield areas but struggle with visibility in the deep outfield.
On the flip side, poles that are too tall—over 70 feet—can waste a lot of light into the sky and surrounding areas, reducing energy efficiency and causing unwanted light pollution. Taller poles also require higher-wattage fixtures to maintain the same lux on the field, which increases operational costs unnecessarily.
Standard recommendations vary depending on the level of play. Small recreational fields usually get by with 40–50 ft poles, mounted with 400–600W LED fixtures, providing around 200–300 lux evenly across the infield and outfield. High school fields often use 50–60 ft poles with 600–1000W LEDs to reach 500 lux, which improves visibility for faster gameplay and larger fields. Professional and televised fields can go up to 60–70 ft poles with 1000–1500W fixtures, producing 1000–1200 lux on the infield to meet broadcast and HD camera requirements.
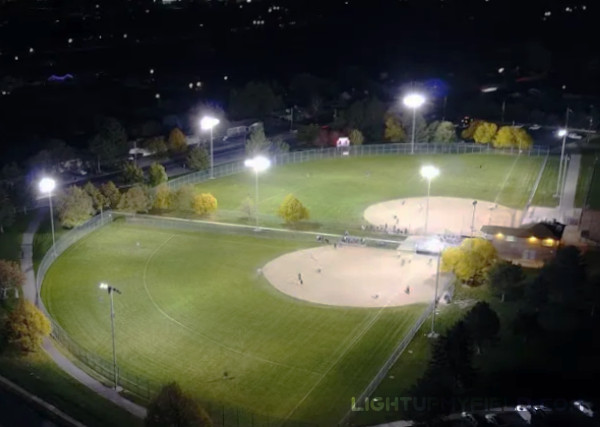
Pole spacing also matters alongside height. For a standard adult softball field, placing poles 90–120 feet apart along the sidelines and behind the outfield ensures overlapping beams cover the entire field without creating dark corners. Improper spacing combined with incorrect height can leave gaps, forcing additional fixtures that increase both installation and energy costs.
Getting pole height right is really about balancing coverage and efficiency. Correct height ensures even lighting, reduced glare, and safer play, while also avoiding unnecessary power consumption and light waste. When done properly, players, umpires, and spectators all benefit from a visually comfortable, well-lit environment.
3. Overlooking the Right Fixture Type
Not all lights are built the same, and picking the wrong type can really sabotage a softball field’s lighting. A lot of older fields still rely on metal halide (MH) lamps, which have lower efficiency, lose brightness faster over time, and consume significantly more power. In contrast, LED fixtures produce far more lumens per watt, maintain brightness for tens of thousands of hours, and allow for precise aiming, making them ideal for even lighting coverage.
For instance, a 1000W metal halide fixture might generate roughly 120,000 lumens, but a 600W LED fixture can provide the same brightness while using 40% less energy. That difference matters not just for your electric bill, but also for achieving uniform lighting across the field. Less efficient fixtures often require more units to compensate for light loss, which can create overlapping hot spots, uneven shadows, and higher installation costs.
Another consideration is fixture durability. Metal halide lamps can drop up to 20% of their output in the first year and continue to degrade, whereas quality LEDs maintain about 90–95% of their initial lumens for over 50,000 hours. Choosing the right fixture type from the start reduces maintenance headaches, improves consistency, and ensures players experience steady, reliable lighting for every game.
4. Ignoring Beam Angles and Light Aiming
 Even the best fixtures won’t help if they aren’t aimed correctly. Beam angles and aiming are just as crucial as wattage and lumens for achieving a well-lit field. Narrow beams can concentrate light too much, creating blinding hotspots in the infield, while wide beams might leave parts of the outfield under-lit, making it hard for fielders to track fly balls or grounders.
Tilt angles also matter. Most softball fields aim lights between 20°–35°, depending on pole height and field dimensions. For example, on a 60-foot pole, a tilt of around 25°–30° typically balances infield and outfield coverage without spilling light into spectator areas or neighboring properties. If the angle is off by just a few degrees, the light may overshoot or leave critical zones dim.
Beam overlap is another piece of the puzzle. Designers aim for a slight overlap of 10–20% between adjacent beams to eliminate dark spots. Poor overlap can result in corners, base areas, or foul lines that are 20–40% darker than the average field lux, creating inconsistent visibility and increasing the risk of misplays.
Professional fields often use simulation software like Dialux or AGi32 to model how each fixture interacts with the field, adjusting angles and beam spread virtually before installation. Yet, many community or recreational fields skip this step, only realizing later that some zones are poorly lit. Correctly addressing beam angles and aiming up front saves time, energy, and money while improving player performance and safety.
5. Forgetting Future Use or Expansion
A mistake many field owners make is installing lights only for current needs without thinking about potential future use. A small community field might host recreational leagues today, but in a few years, it could see semi-pro tournaments, evening training sessions, or televised games. Without planning ahead, the existing lighting may fall short.
For instance, a four-pole setup delivering 250 lux might be fine for casual evening games, but semi-pro or college-level tournaments often demand 500–700 lux across the infield and outfield. Upgrading later usually means adding extra poles, installing higher-wattage fixtures, or replacing older units entirely—costs that can easily run into tens of thousands of dollars.
Planning for expansion at the start can save money and hassle. For example, installing extra conduit, oversized poles, or modular fixture mounts during the initial build makes it much easier to scale the system as field usage grows. Considering future lux requirements and pole spacing ensures the field remains versatile without repeated major investments.
6. Skipping Electrical and Control Considerations
Softball field lighting isn’t just about the fixtures; the electrical infrastructure and controls are just as important. Neglecting wiring, grounding, or control systems can lead to safety hazards, inefficiency, and unreliable lighting.
Modern fields often include smart controls, timers, dimmers, and even remote access via apps. These allow operators to adjust brightness for practice sessions, night games, or tournaments, which can reduce energy consumption by 30–50% annually. Without proper planning, circuits can become overloaded, lights might flicker, or schedules may fail, creating frustration for players and staff.
Proper electrical design also ensures longevity of the fixtures. For instance, poorly grounded or inadequately rated wiring can cause voltage drops, reducing lumen output by 10–20%, which impacts uniformity and player visibility. Over time, repeated power issues can shorten the lifespan of LEDs or metal halide lamps, leading to unexpected maintenance costs.
By integrating electrical planning and control systems from the start, you not only maintain consistent brightness but also improve energy efficiency, safety, and reliability—making the field functional and cost-effective for years to come.
7. Poor Maintenance Planning
Even the most modern LED fixtures aren’t completely maintenance-free. Over time, dust, dirt, and weathering can reduce light output by 2–3% per year. For a field that initially delivered 500 lux for high school play, this drop could bring it down to around 450–460 lux within a few years—enough to affect visibility, uniformity, and safety.
Planning for maintenance isn’t just about cleaning. Tilt-down mounts or fixtures with easy access can save hours of labor, while accessible pole locations allow for inspections and minor repairs without needing cranes or special equipment. Scheduling annual or biannual cleaning and checks ensures that lux levels remain consistent across the field, protecting both players and spectators.
Neglecting this step can create uneven lighting faster than most people expect. For example, corners near the foul lines or the outfield might drop to 50–60% of average lux if dirt accumulates on lenses, creating shadowed areas that increase the risk of misplays or minor injuries.
8. Over-Lighting or Glare Issues
 More wattage doesn’t always mean better visibility. In fact, over-lighting can produce glare, eye strain, and harsh contrasts, which actually make it harder for players to track the ball.
Imagine a field where the infield reads 1000 lux but the outfield only gets 400 lux. Players moving from one zone to another have to constantly adjust to the sudden difference in brightness, which can lead to missed catches or misjudged fly balls. Over-bright fixtures can also spill light into spectator areas, streets, or neighboring properties, potentially violating local lighting ordinances and annoying nearby residents.
Balancing brightness requires careful wattage calculation, fixture optics, and aiming. Using LED floodlights with adjustable beam angles allows you to focus light exactly where it’s needed, while reducing energy waste. Overlapping beams and properly positioning poles ensures smooth transitions between infield and outfield, preventing hotspots and harsh shadows.
Properly planned, a field can provide 600–700 lux for competitive amateur play or 1000–1200 lux for televised games without causing glare or discomfort. It’s about using the right amount of light in the right places, rather than just cranking up wattage.
9. Ignoring Field Surface and Surroundings
The type of playing surface and the surrounding environment play a surprisingly big role in how your lights perform. Synthetic turf, for instance, reflects more light than natural grass, which can help achieve the desired lux with fewer watts. On the other hand, darker natural grass or wet surfaces absorb more light, often requiring more powerful fixtures or additional poles to maintain uniformity.
Surroundings like trees, fences, poles, or nearby streetlights can also influence coverage. Shadows cast by these objects can create dim spots, while ambient light from streetlamps might interfere with uniformity calculations. For example, a 200-foot synthetic turf field can reach uniform 500 lux with up to 40% less total wattage than a natural grass field—but only if the design considers reflection, obstacles, and beam placement.
Failing to account for these factors often leads to overcompensating with higher wattage, which wastes energy, increases costs, and can produce glare or light spill. Correctly assessing the field and surroundings before installation ensures energy-efficient lighting and consistent visibility across the entire playing surface.
10. Failing to Test Before Full Installation
Skipping testing or simulation is another mistake that can cost time and money. Installing an entire lighting system without first verifying coverage often leads to uneven lighting, glare, or hotspots that could have been spotted earlier.
Even a temporary setup with 2–4 test poles can provide valuable insight. Measuring lux levels at key points—like the pitcher’s mound, bases, infield, and outfield corners—helps identify areas that are under-lit or over-bright. Test installations also allow you to adjust aiming angles, beam spread, and pole positioning before committing to the full system.
Software simulations using tools like Dialux or AGi32 are another option, showing how fixtures interact with the field, poles, and surrounding objects. These simulations often highlight problems that are hard to predict on paper, such as overlapping shadows, glare for batters, or inconsistencies in the outfield. Taking the time to test or simulate saves thousands of dollars in wasted fixtures or energy and prevents frustration during the first few games under lights.
Getting It Right
Avoiding these mistakes doesn’t mean you need a massive budget or professional crew, but it does mean planning, measurement, and the right technology. Properly designed fields balance pole height, fixture type, aiming, wattage, and maintenance for even coverage that keeps players safe, enhances performance, and makes night games enjoyable.
Good design upfront can save tens of thousands in energy and retrofit costs. For community parks, a well-planned LED system might use 10,000–15,000 watts efficiently, while pro-level fields with 60–80 fixtures can deliver 1000–1500 lux across the infield without unnecessary glare or hotspots.