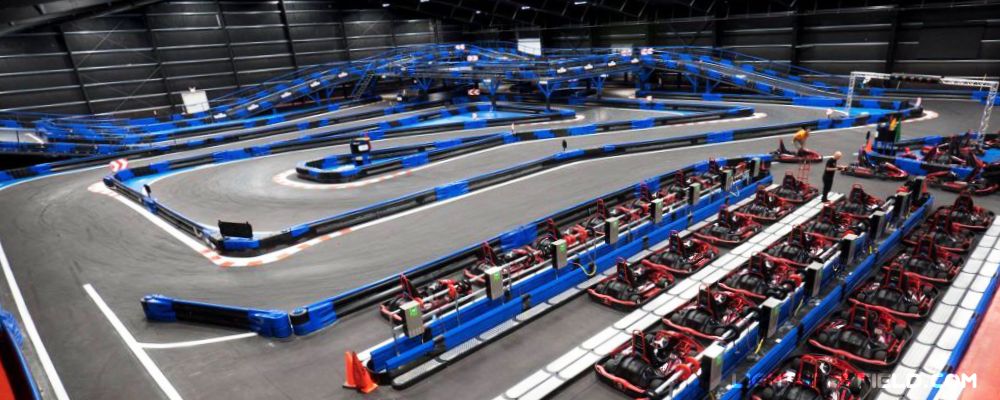
If you’ve ever raced go-karts at night, you know that good lighting makes or breaks the fun. It’s not just about seeing where you’re going—it’s about creating an exciting atmosphere, keeping drivers safe, and making sure every curve and straightaway is clear. Whether it’s for a family entertainment center, an outdoor race circuit, or an indoor track, lighting design plays a big role in how the place feels and functions.
Go-kart track lighting might sound straightforward, but once you get into brightness levels, uniformity, wattage, and installation height, you realize it’s a bit of an art and science combo. Let’s go through how it all works, what it costs, and what people usually ask when planning their own track lighting setup.
Introduction to Go-Kart Track Lighting
The Constituents of a Lighting System
When it comes to setting up a proper go-kart track lighting system, it’s not just about throwing a few lights around and calling it a day. A full system usually includes LED floodlights or spotlights, mounting poles or brackets, underground or conduit wiring, and a control system that manages everything from dimming levels to automatic timers. Some modern tracks even install motion sensors or smart schedulers to save power when no one’s racing.
Most tracks today go for high-output LED fixtures, typically in the 150W to 400W range. LEDs have completely replaced old-school metal halide and halogen lights because they deliver higher brightness with lower energy consumption and way less heat. To give you an idea, a 300W LED can easily replace a 1000W metal halide lamp, cutting power use by about 70%. That’s a big difference when you’re running 30 or 40 fixtures every night.
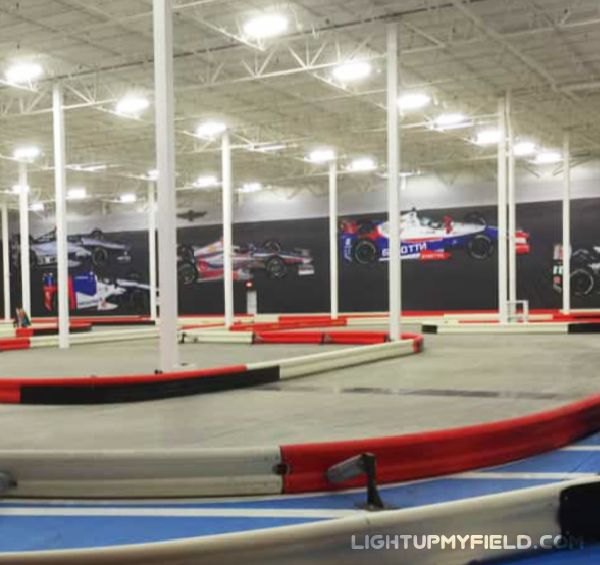
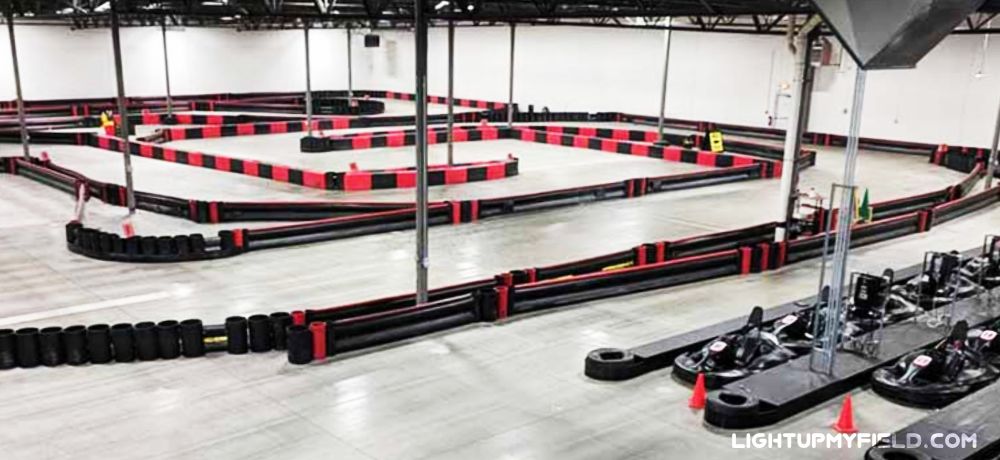
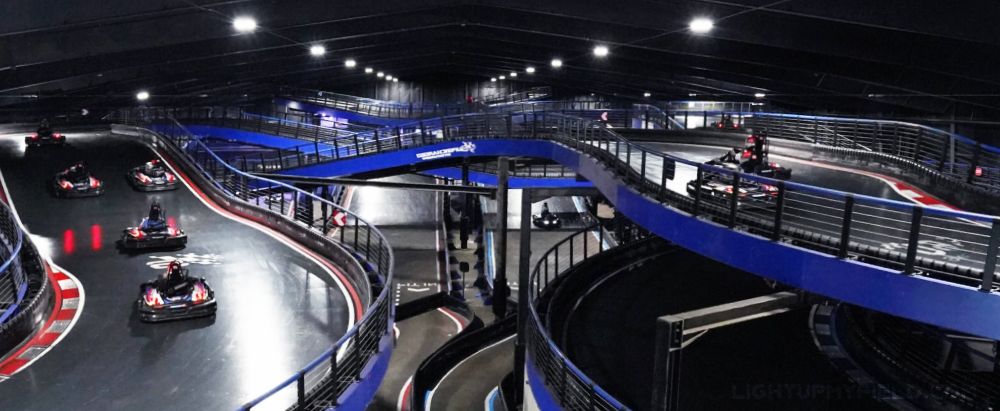
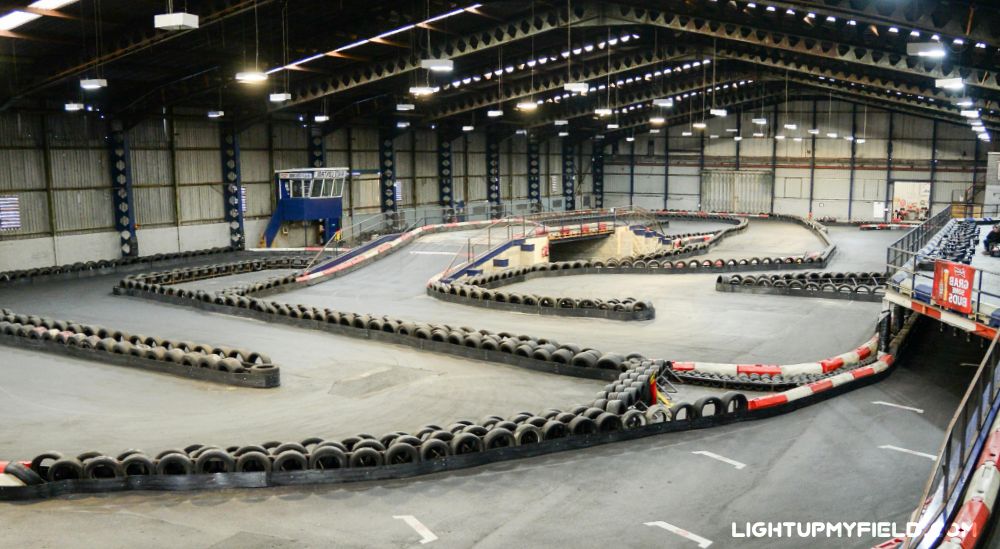
Outdoor tracks usually mount lights on 8- to 12-meter poles spaced evenly along the edges or near curves, braking zones, and pit areas. These positions help prevent shadows and improve depth perception for drivers. For indoor circuits, it’s a bit different — lights are often ceiling-mounted or suspended at heights between 5 and 7 meters, using wide-beam LED panels or linear fixtures to spread light evenly across tight corners without creating glare spots.
Each fixture also needs to be tough enough to handle the environment. Outdoor lights should come with at least an IP65 or IP66 waterproof rating to handle rain, dust, and humidity. Some high-end models even use die-cast aluminum housings with corrosion-resistant coatings, especially if the track is near the coast or in a humid climate.
And it’s not just the hardware — wiring design and grounding also matter. Most professional installations include weatherproof junction boxes, circuit protection, and proper cable management to avoid safety risks. Skipping those details might save money upfront, but it can cause flickering issues or even electrical faults later on.
The Functions of Track Lighting
 So, what’s the actual purpose of all this lighting gear? It’s not only about brightness — it’s about visibility, safety, and experience.
For racers, lighting defines how well they can read the track at speed. A sharp beam helps them judge distances and react to turns faster. On average, most tracks aim for 200 to 400 lux of brightness, while professional-grade circuits go higher, sometimes up to 500 lux, especially for night racing or competitive events. That’s bright enough for drivers to see every detail on the track surface — from painted lane lines to small debris.
Good lighting also keeps spectators and staff safe. Clear visibility around pit lanes, entry zones, and barriers reduces the risk of accidents and helps track marshals respond faster. It’s one of those things you don’t think about until it’s missing — a single dark patch on a turn can completely throw off a racer’s line.
Beyond safety, lighting sets the mood and atmosphere of the venue. Cooler white tones (around 5000K–6000K) give the track a sharper, professional look — kind of like what you’d see in a motorsport broadcast. On the flip side, warmer tones (3000K–4000K) create a more relaxed and welcoming vibe, perfect for family-oriented karting centers or indoor entertainment venues.
Lighting also plays a big role in how the track looks on camera. With more races being live-streamed or posted online, lighting needs to be camera-friendly — meaning high CRI (Color Rendering Index) and consistent color temperature so that everything looks natural on video. A CRI of 80 or above is generally preferred for filming, as it makes colors (like the red and blue of karts) pop more vividly.
Go-Kart Track Lighting Design and Layout Tips
Designing lighting for a go-kart track isn’t just about brightness — it’s about creating the right balance between visibility, energy use, and atmosphere. Whether it’s an indoor arena or an outdoor circuit under the stars, every lighting detail affects how racers see, react, and enjoy the ride. Let’s break down the main design factors in more depth.
Brightness and Uniformity
When you’re talking about brightness, lux is the measurement you want to focus on. Most go-kart tracks aim for 200 to 400 lux on average, which gives enough visibility without being harsh on the eyes. If it’s a competitive track with longer straightaways or higher speeds (say 60–80 km/h), bumping that up to 500 lux can make a real difference in clarity and reaction time.
The trick isn’t just about hitting that lux level—it’s about keeping the light consistent across the track. If certain spots are super bright while others are dim, drivers’ eyes have to constantly adjust, which can throw off their rhythm or even cause temporary vision strain. A solid target is to keep the uniformity ratio (minimum to average illuminance) above 0.6, meaning no area should be drastically darker than the average brightness.
In practice, that means more overlapping light beams, precise fixture spacing, and careful aiming. For example, if you have a 400-meter outdoor circuit, spacing your floodlights about 20–25 meters apart with slightly overlapping coverage ensures there are no “blind” zones, even on sharp turns.
Color Temperature and Light Tone
 Color temperature gives your track its overall mood. Most setups stay between 4000K and 6000K, which looks clean and natural to the eye. A 4000K light gives a softer, neutral-white tone—great for casual or indoor tracks where comfort matters. Meanwhile, 6000K, which mimics daylight, feels sharper and more energetic—perfect for outdoor night races or professional competitions.
Go too low, like 3000K (which looks more yellowish), and you risk losing that crisp visibility drivers rely on, especially when judging distances or reacting to corners. Research shows that cooler white lights (5000–6000K) improve contrast and object detection, which helps racers spot curbs, track edges, and other karts faster.
Some high-end LED systems even let you adjust the color temperature depending on the event. For example, you can set 4500K for fun family sessions and 6000K for pro tournaments under broadcast lighting.
Glare Control and Visibility Comfort
No racer wants to be blinded mid-turn. Glare happens when a light source is too intense or aimed poorly, and it can be a real safety issue. That’s why anti-glare design is a huge part of go-kart lighting. Using fixtures with hoods, diffusers, or asymmetric beam angles helps keep the light where it should be—on the track, not in people’s eyes.
It’s smart to do a quick field test before finalizing your setup. Walk or drive around the circuit after installing a few lights and check how reflections hit your eyes or bounce off barriers and guardrails. If the surface is glossy (like some painted barriers), even a small angle tweak—say, changing the tilt from 30° to 25°—can reduce glare dramatically.
For tracks with reflective signs or metallic surfaces, using lights with a beam cutoff or a narrower beam spread (like 60–90°) helps minimize unwanted reflections.
Aiming Direction and Lighting Angle
Getting the aiming direction right is where lighting design feels more like art. Most floodlights for go-kart tracks are set at a downward angle between 25° and 35°, depending on pole height and beam spread. Aim too low and you’ll create dark gaps; aim too high and you’ll waste light or cause glare.
For example, if your poles are 10 meters tall, a 30° aiming angle usually provides a smooth balance—lighting the track without spilling light into the stands or the sky. The goal is to have light beams crossing gently over the track surface so each section is covered from more than one direction. That layered illumination gives drivers better depth perception and reduces harsh shadows from karts or barriers.
If you’re installing around curves or hairpin sections, use asymmetric floodlights—these are designed to push light forward in one direction without scattering it upward. It makes the corners bright and clear without blinding oncoming racers.
Determining Wattage and Fixture Type
So how powerful should your lights be? For a 400-meter outdoor circuit, you’re looking at roughly 30 to 40 LED floodlights with each unit ranging between 200 and 400 watts. Indoor circuits can often get by with 15 to 25 fixtures of 150 to 250 watts, depending on ceiling height and wall color (darker walls absorb more light).
Since modern LEDs produce about 130–160 lumens per watt, even a 200W fixture can generate around 30,000 lumens—plenty for high-speed visibility. Compared to older metal halide lamps, you get almost double the brightness for half the energy use.
It’s also a good idea to mix a few different beam spreads—say, 60° for straight sections and 90° for wide corners—to balance coverage.
How Many Lights Are Needed in Total?
There’s no universal number, but you can estimate by area. For instance, a compact 100-meter indoor circuit (roughly 1,500–2,000 m²) might need 12–16 fixtures spaced evenly overhead. A full-size outdoor racing track with long straights and wider corners could require 50–60 floodlights to maintain even coverage.
A rough guideline is 1 fixture for every 70–100 m² of track area, adjusted based on beam angle and mounting height. More overlapping light means fewer dark spots and a smoother racing experience. Think of it as “painting light”—the beams should blend like layers of color rather than forming sharp boundaries.
Installation Height and Pole Placement
Pole height affects everything—from brightness distribution to glare control. For outdoor go-kart tracks, 8–12 meters is a good height range. Taller poles (closer to 12m) spread light wider and more evenly, but you may need higher-wattage fixtures to compensate for the extra distance. Indoor setups usually keep lights at 5–7 meters high, ensuring enough downward coverage without creating shadows behind barriers or walls.
As a quick example: a 10-meter pole with a 30° beam angle can illuminate roughly 40–45 meters of track width effectively. Spacing poles about 25–30 meters apart keeps the light consistent and avoids uneven brightness.
You can also combine perimeter poles with a few central-mounted fixtures (especially for large outdoor turns) to fill gaps. Just make sure every pole is stable, weatherproofed, and grounded—especially in windy or coastal environments.
Energy Efficiency and Smart Controls
One of the biggest perks of modern go-kart lighting is how efficient it’s become. LED systems can save up to 70% in energy use compared to older halogen or metal halide setups. That means lower electricity bills and less heat output—which also helps your fixtures last longer.
To take it further, you can integrate smart lighting controls. For example, motion sensors can dim lights automatically when no one’s on the track, and scheduling systems can switch lighting scenes for daytime, nighttime, or maintenance modes. Some facilities even use app-controlled lighting systems that let staff adjust brightness or color temperature in seconds.
If you’re running an outdoor facility, consider solar-powered LED poles. In sunny regions, a hybrid solar-LED setup can cut your energy bills by 30–40% over the long term. With panels charging during the day and lights running at night, you get consistent illumination without relying entirely on the grid.
| Factor | Recommendation/Range |
|---|
| Brightness (Lux) | 200–400 lux (average), 500 lux (competitive) |
| Uniformity Ratio | >0.6 |
| Color Temperature (K) | 4000K (soft), 6000K (daylight) |
| Glare Control | Use hoods, diffusers, and asymmetric beams |
| Lighting Angle (°) | 25°–35° (downward angle) |
| Fixture Wattage | Outdoor: 200–400W (30–40 fixtures for 400m track) Indoor: 150–250W (15–25 fixtures) |
| Fixture Spacing | 20–25 meters (outdoor circuit) |
Cost Involved in Go-Kart Track Lights
Setting up lighting for a go-kart track isn’t just about picking the brightest LEDs — it’s also about budgeting wisely for every stage, from buying the fixtures to keeping them running efficiently year after year. The total investment can vary a lot depending on track size, design complexity, and the type of lighting technology you choose. Here’s a breakdown of the main costs and what goes into each one.
Light Cost
The biggest upfront expense is usually the lights themselves. Quality matters here — high-end LED floodlights not only last longer but also maintain brightness and color consistency over time. Most reliable fixtures cost between $150 and $500 each, depending on the wattage, brand reputation, and waterproof rating (like IP65 or IP66).
For example, a 400W LED floodlight from a trusted brand can easily push out 60,000 lumens, enough to light up a good section of track without strain. So, if you’re setting up a medium-sized outdoor circuit with around 30 fixtures, you’re looking at roughly $6,000 to $12,000 just for the lights. That’s assuming mid-range models; premium stadium-grade ones could push the total closer to $15,000–$18,000.
If your track is indoors and smaller, the lighting package will naturally cost less—maybe $3,000 to $6,000 total for 15–20 LED panels or high-bay lights. But whatever the setup, investing in quality LEDs with high luminous efficacy (130–160 lumens per watt) pays off in the long run because they use less electricity and need fewer replacements.
Installation Cost
Once you have the lights, the next expense is installation — and this can vary widely based on how complex the layout is. For outdoor tracks, the cost is usually higher since you’ll need poles, wiring, waterproof connectors, and sometimes trenching for underground cables. Labor and materials combined can run anywhere from $5,000 to $10,000 for a standard circuit.
For indoor tracks, it’s generally cheaper. Ceiling installations often cost around $2,000 to $5,000, since you’re not dealing with pole foundations or outdoor weatherproofing. However, if you decide to include smart lighting systems—like automatic dimmers, programmable timers, or DMX control panels—installation and setup may add another $1,000–$2,000.
A tip: try grouping lights into zones during installation. That way, you can control different parts of the track separately (for instance, dimming the pit lane while keeping the race area bright). It adds flexibility without a huge cost increase.
Running Cost
After setup, the running cost is what you’ll notice month to month. Luckily, LEDs are super efficient compared to old-school halogen or metal halide lamps. Let’s do a quick calculation.
If you’re using 30 LED floodlights rated at 400 watts each, that’s 12 kW total power. Running them for 6 hours per night uses 72 kWh per day, or roughly 2,160 kWh per month. At an average rate of $0.12 per kWh, your monthly power bill would land around $260.
In contrast, an older lighting system with the same brightness might easily consume 5,000 kWh or more per month, costing over $600 monthly. So, switching to LEDs could save you nearly 60% on electricity every month.
If you add smart controls or dimming schedules, you can save even more. Many tracks that integrate motion sensors or timed lighting systems report saving another 10–20% on top of that.
Maintenance Cost
One of the reasons LEDs are so popular for go-kart tracks is their low maintenance needs. Unlike traditional lights that need bulb replacements every year or two, LED fixtures can last 50,000–70,000 hours—that’s about 10 to 12 years of normal use.
Still, you’ll want to schedule annual inspections to check wiring, tighten mounts, and clean lenses (especially for outdoor setups where dust, insects, or rain residue can affect brightness).
Maintenance costs are usually pretty minor—somewhere between $300 and $800 per year depending on track size. That covers occasional replacement of a few fixtures or drivers, as well as cleaning and recalibrating light angles if needed.
If you’re running a busy commercial track, it’s worth keeping one or two spare fixtures on hand. That way, if one fails mid-season, you don’t have to wait weeks for a replacement to ship.
Miscellaneous Costs
Every lighting project has a few hidden extras that can sneak up if you don’t plan ahead. These might include spare parts, replacement poles, electrical junction boxes, surge protectors, or even safety signage for high-voltage areas.
For outdoor installations, you might also need lightning protection or grounding systems, especially in regions with frequent storms. Those can add a few hundred dollars to the overall setup but are worth every penny to protect your investment.
As a general rule, it’s smart to budget an additional 5–10% of your total lighting cost for these miscellaneous expenses. So, if your main project costs $15,000, keep a $750–$1,500 buffer for unexpected add-ons or small upgrades down the line.
| Cost Factor | Indoor | Outdoor |
|---|
| Light Cost | $3,000–$6,000 (15–20 fixtures) | $6,000–$12,000 (30 fixtures) |
| | | Premium models: $15,000–$18,000 |
| Installation Cost | $2,000–$5,000 (ceiling install) | $5,000–$10,000 (poles, wiring, trenching) |
| Smart Controls Installation | +$1,000–$2,000 (optional) | +$1,000–$2,000 (optional) |
| Running Cost | Approx. $130/month (30 fixtures) | Approx. $260/month (30 fixtures) |
| | (For 6 hrs/day, at $0.12/kWh) | (For 6 hrs/day, at $0.12/kWh) |
| Maintenance Cost | $300–$800/year | $300–$800/year |
| Miscellaneous Costs | 5–10% of total lighting cost | 5–10% of total lighting cost |
| Additional Expenses | (Spare parts, electrical components) | (Lightning protection, surge protectors) |
Q&A
What makes go-kart lighting different from regular outdoor lighting?
Go-kart track lighting needs to handle fast-moving vehicles, curved layouts, and safety zones, which makes it a bit more complex than typical street or field lighting. You’re not just lighting up a flat space — you’re highlighting direction changes, braking areas, and spectator sections. The lighting has to give racers depth perception and help them read corners accurately at speed.
Regular floodlights can’t always do that, which is why go-kart tracks often use asymmetric beam LEDs or customized light angles that “follow” the turns instead of just blasting light straight down.
Can I reuse existing light poles or fixtures from another setup?
You can, but only if they’re compatible with your new LED system. Many older poles were designed for heavier, less efficient lamps, and the mounting brackets or tilt angles might not fit new floodlight designs. Also, older wiring might not handle LED drivers safely or efficiently.
If the poles are still structurally sound and tall enough (say 8–10 meters for outdoor circuits), you can absolutely reuse them—just have a technician check the foundation and wiring load before installing anything new.
Is it okay to mix different brands or wattages of lights?
Technically, yes, but it’s not ideal. Mixing different brands or models often results in uneven color tones or mismatched brightness, which can make the track look patchy and throw off visibility. For example, one light might give a cooler, bluish tone while another nearby produces a warmer hue—it doesn’t just look inconsistent, it can actually distract drivers.
If you must mix, make sure the lights have similar color temperature (within 300K) and comparable beam angles. It’s usually better to stick to one lighting series or at least one manufacturer for uniform performance.
Do go-kart tracks need lighting for the spectator or pit areas too?
Yes, and it’s often overlooked. The pit lane, maintenance zone, and spectator stands need a softer, lower brightness level—around 100–150 lux—so they feel comfortable but don’t overpower the track lighting.
Good pit lighting helps mechanics work safely and quickly between runs, while subtle stand lighting gives spectators visibility without distracting from the race action. Some tracks even use colored accent lighting (like warm white or soft amber) around the audience zones to give the venue more atmosphere.
How do I reduce shadow areas on sharp turns?
Shadows happen when lights are aimed from only one direction. To fix that, you want cross-illumination, meaning lights from both sides of a curve hitting the same area from different angles. This method fills in dark spots behind barriers and makes karts visible from all sides.
If your budget allows, place extra fixtures at critical corners or chicanes, ideally lower on the poles (6–8 meters) with narrower beam angles, so they hit the curve directly. It gives a smoother, more even light pattern and enhances driver visibility when entering or exiting turns.
Can track lighting be used for filming or live streaming races?
Definitely! In fact, more tracks are upgrading lighting precisely because they want to live stream night races or post highlight clips online. For camera work, you’ll want lights with a high CRI (Color Rendering Index) of 80 or above and steady color temperature, ideally around 5000–5500K.
That level of accuracy helps the footage look natural and reduces flicker when shot in slow motion or under different camera frame rates. If you plan to do frequent video content, go for flicker-free LED drivers—they’re designed for broadcast-quality lighting.
What kind of power supply setup should I prepare for?
Most go-kart lighting systems run on AC 220–240V power, though large outdoor setups might use three-phase 380V systems for better load distribution. Always make sure your breakers, cables, and junction boxes are sized correctly for the total wattage.
If you’re running a 15 kW lighting system, for example, you’ll need wiring that can safely handle around 80–100 amps total, depending on voltage and circuit distribution. Installing surge protectors and proper grounding is also a must, especially in areas with frequent storms.
Is it possible to control the lights remotely?
Yes—and it’s actually pretty convenient. Modern LED systems can connect to Wi-Fi or control hubs that let you adjust brightness or switch scenes right from your phone, tablet, or computer.
You can schedule different lighting “modes” — for example, practice mode, race mode, and maintenance mode — each with different brightness levels. It saves time and keeps energy usage in check. Some systems even log electricity consumption so you can track your running costs in real time.
How do weather and climate affect go-kart lighting systems?
Temperature and humidity can affect LED performance over time. In hot or tropical climates, make sure your fixtures have good heat dissipation—look for aluminum housings and breathing valves. In cold regions, ensure your drivers are rated for -30°C or lower, so they don’t fail in freezing conditions.
It’s also smart to apply anti-corrosion coatings or use stainless-steel brackets if your track is near the coast. Salt air can wear out metal parts surprisingly fast.
What’s the best way to plan for future upgrades?
Always think ahead when setting up your lighting system. If you’re starting small, make sure your circuit design and power supply can handle extra fixtures later. Leave space on poles for more lights, and run slightly thicker wiring than you immediately need—it’ll save you a ton of money when you expand.
Also, choose lights with modular components, so if technology advances or you want brighter options later, you can swap out the LED modules or drivers without replacing the whole fixture.
Wrapping Up the Race
Lighting a go-kart track isn’t just about throwing some floodlights around—it’s about designing a visual rhythm that keeps drivers safe, spectators engaged, and the whole place buzzing with energy. With well-planned brightness, even color tone, and smart controls, you can make the track look stunning and run efficiently.
From the cost breakdown to setup tips, getting your lighting right means better safety, atmosphere, and long-term savings. Once you see that perfectly lit curve glowing under the night sky, you’ll know every watt was worth it.